
How do I place and resize Tags?
The various tags available to you will depend on what Certificate Policy you are using. Once you select a Certificate Policy for your ePak, the toolbar above your document working area will populate all the available tags to choose from. Some Certificate Policies may only have a Signature block tag available, while others have additional Tags such as Signer Name, Date/Time, Reason, Initial, etc. After you upload your document, you can drag and drop tags as per your requirement. To resize them:

- Simply click on a Signer in your workflow (they will be highlighted yellow when selected).
- Click and drag a tag from the toolbar above the document and release it on the desired place in the document. The tag will appear.
- You will notice that the tag has “handles” (small boxes in the corners) that you can click and drag to increase and decrease the size of the tag.
- Additional controls appear in the Tag Resize Panel to the right of the document, allowing you to control the font, font size and other attributes such as bold or italic. For a few tags like Custom Text and Custom Text Area you can even control properties like the label and the Placeholder text.
- You may move the tag by clicking on the blue area and dragging and releasing it.
How do I place and resize Tags?
The various tags available to you will depend on what Certificate Policy you are using. Once you drop the tags on your ePak, click the gear icon and the panel on the right will show all the options to control the Height, Width, font, font size and other attributes such as bold or italic.
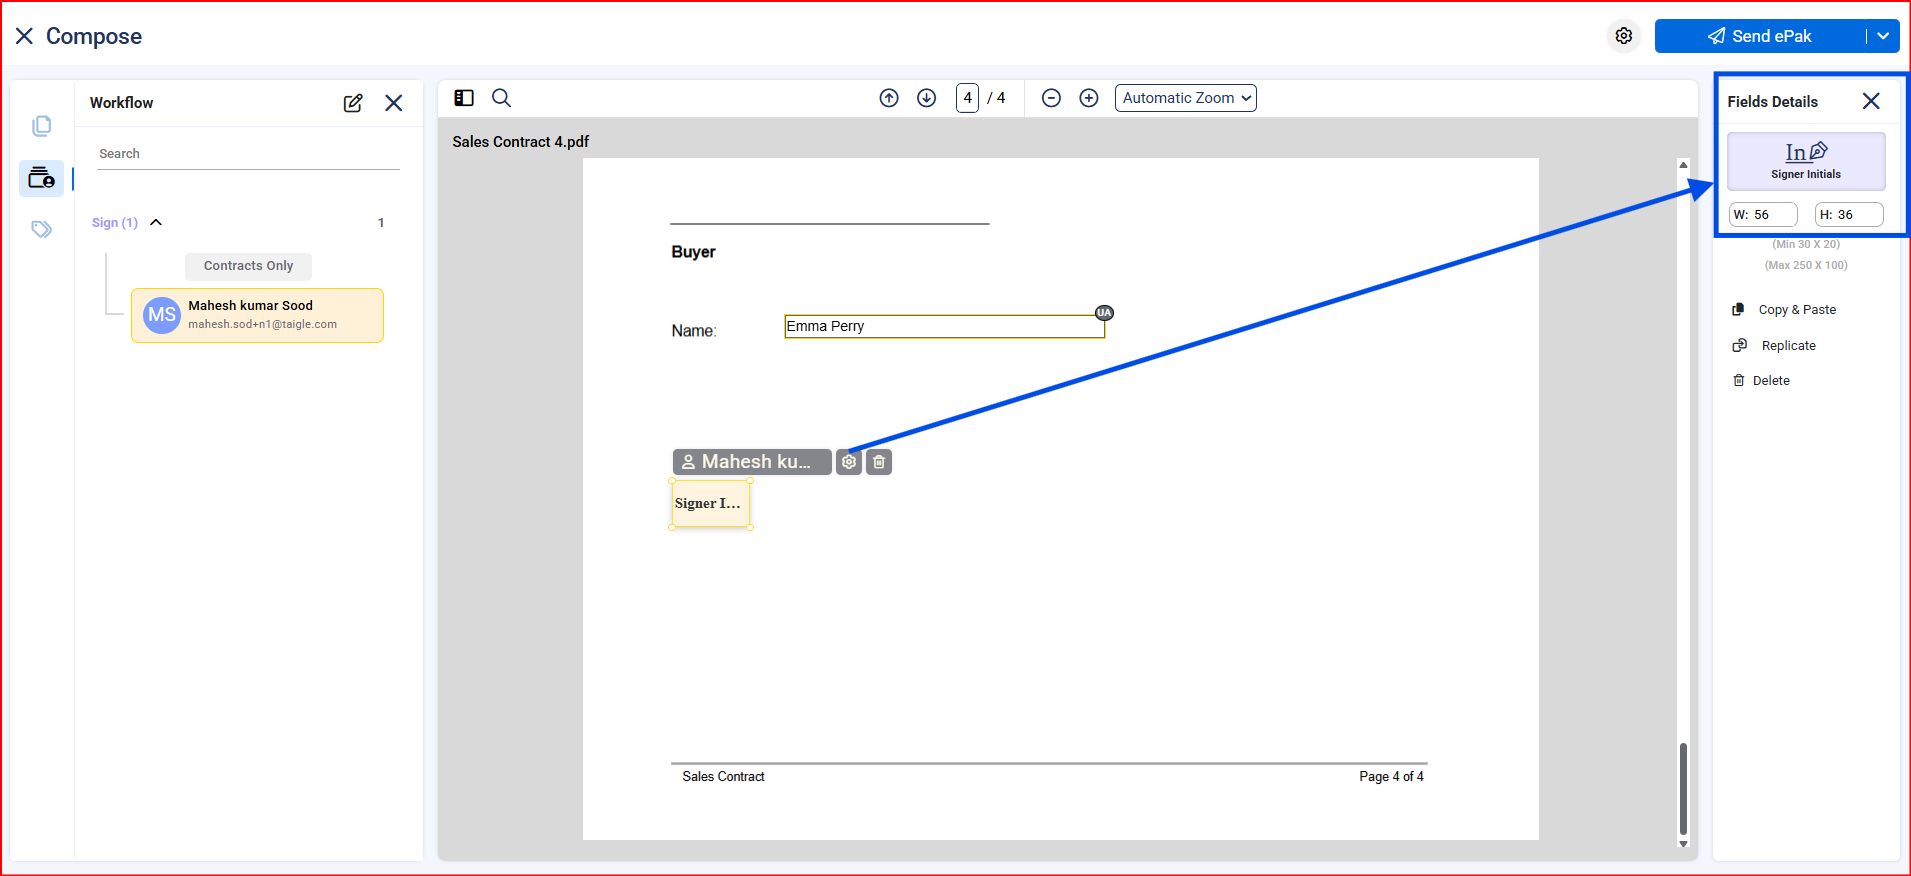
For a few tags like Custom Text and Custom Text Area you can even control properties like the label and the Placeholder text.
