Can I change the signatories assigned to an ePak that has already been sent out for signatures?
As an ePak custodian, you may change the signer of a pending ePak if they haven’t signed yet. To do so, follow the steps below:
- You may choose an ePak from your pending folders and go to Edit tab in the lower part of the page.
- Click on the Edit button next to a signer’s name and a text box appears that will allow you to add a new signer (you will only be able to change signers/reviewers that have not yet signed the ePak).
- As you begin typing, it will show you list of suggested names from your Favorite Users, and you may select from it. If you have previously sent an ePak to the recipient, they will appear in your Favorite Users list when you start typing their name. If the user does not appear, you may click the Search link to search all users. If the user does not have an account, you may add them by typing in their email address and pressing enter. You will be asked to provide user’s first name, middle name (optional), and last name.
- Click Save and the signer will be changed. It displays a success message.
- The ePak will no longer be available to the previous signatory and will get removed from their Inbox. The new signer will in turn be notified via an email and this ePak will move to his/her Inbox folder.

Can I change the signatories after an ePak has already been sent out for signatures?
As an ePak custodian, you may change the signer of a pending ePak if they haven’t signed yet. To do so, follow the steps below:
1) Choose an ePak from your pending folder.
2) On the ePak details page, under Recipients, Click on Change Recipient next to a signer’s name. A text box appears that will allow you to add a new signer. You will only be able to change signers/reviewers that have not yet signed the ePak.
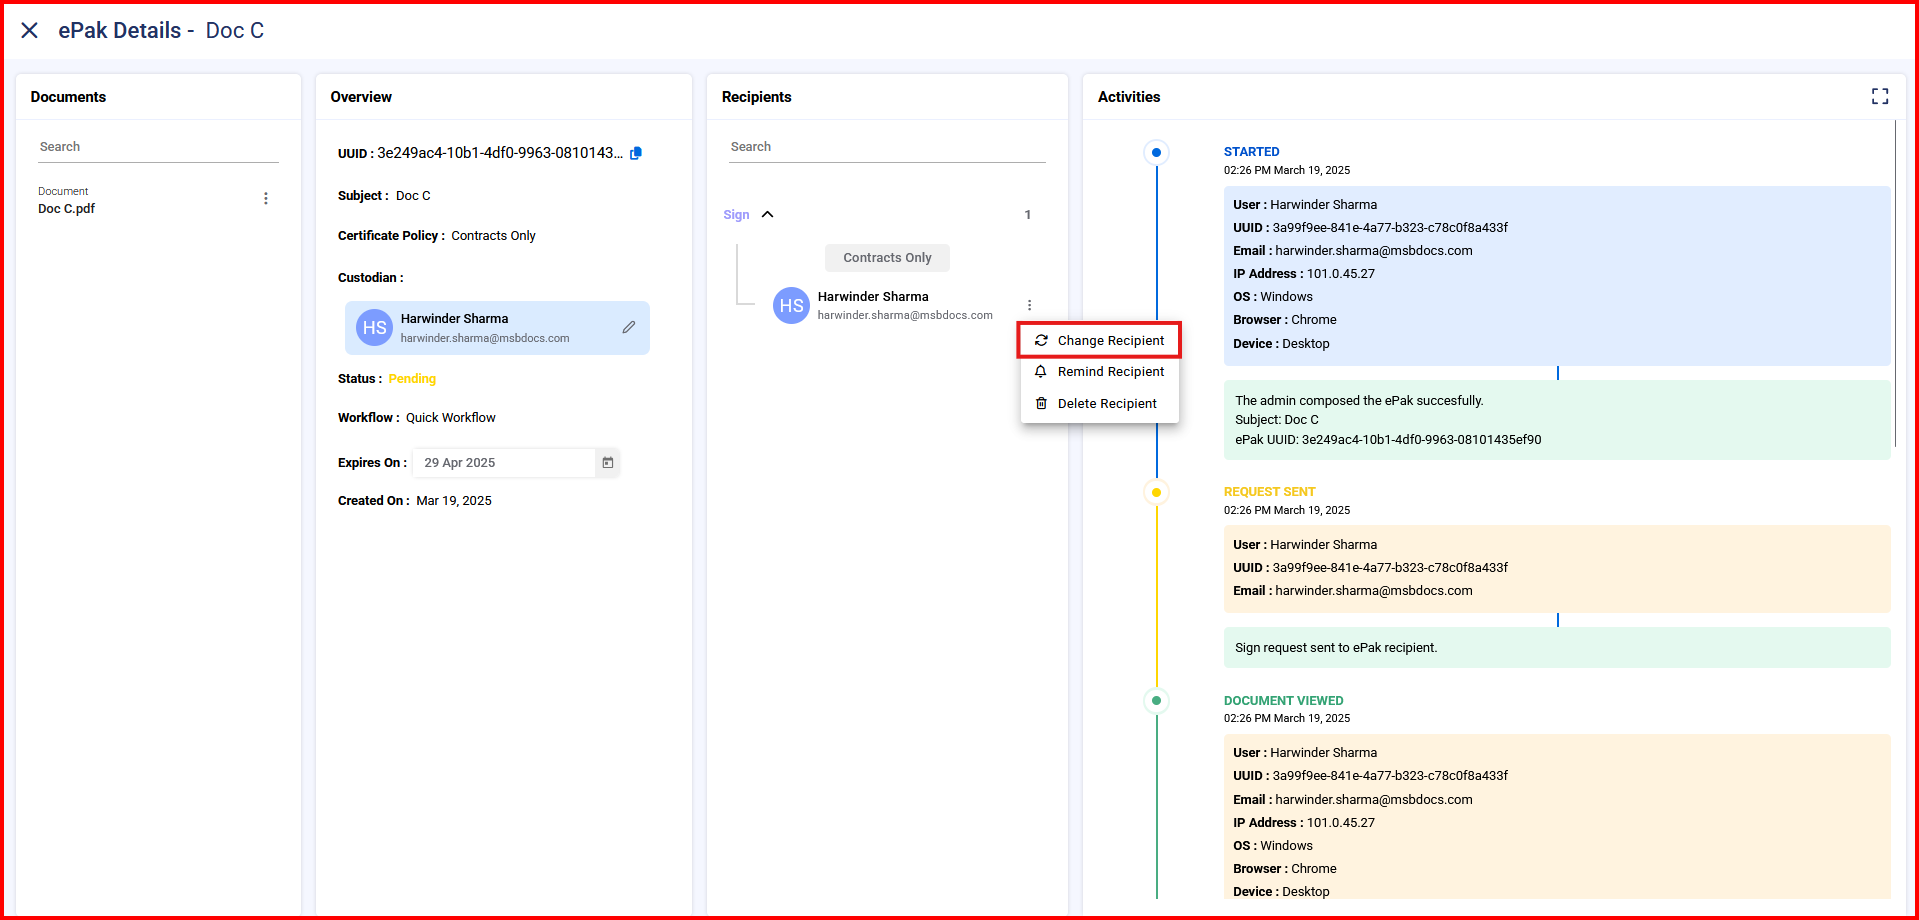
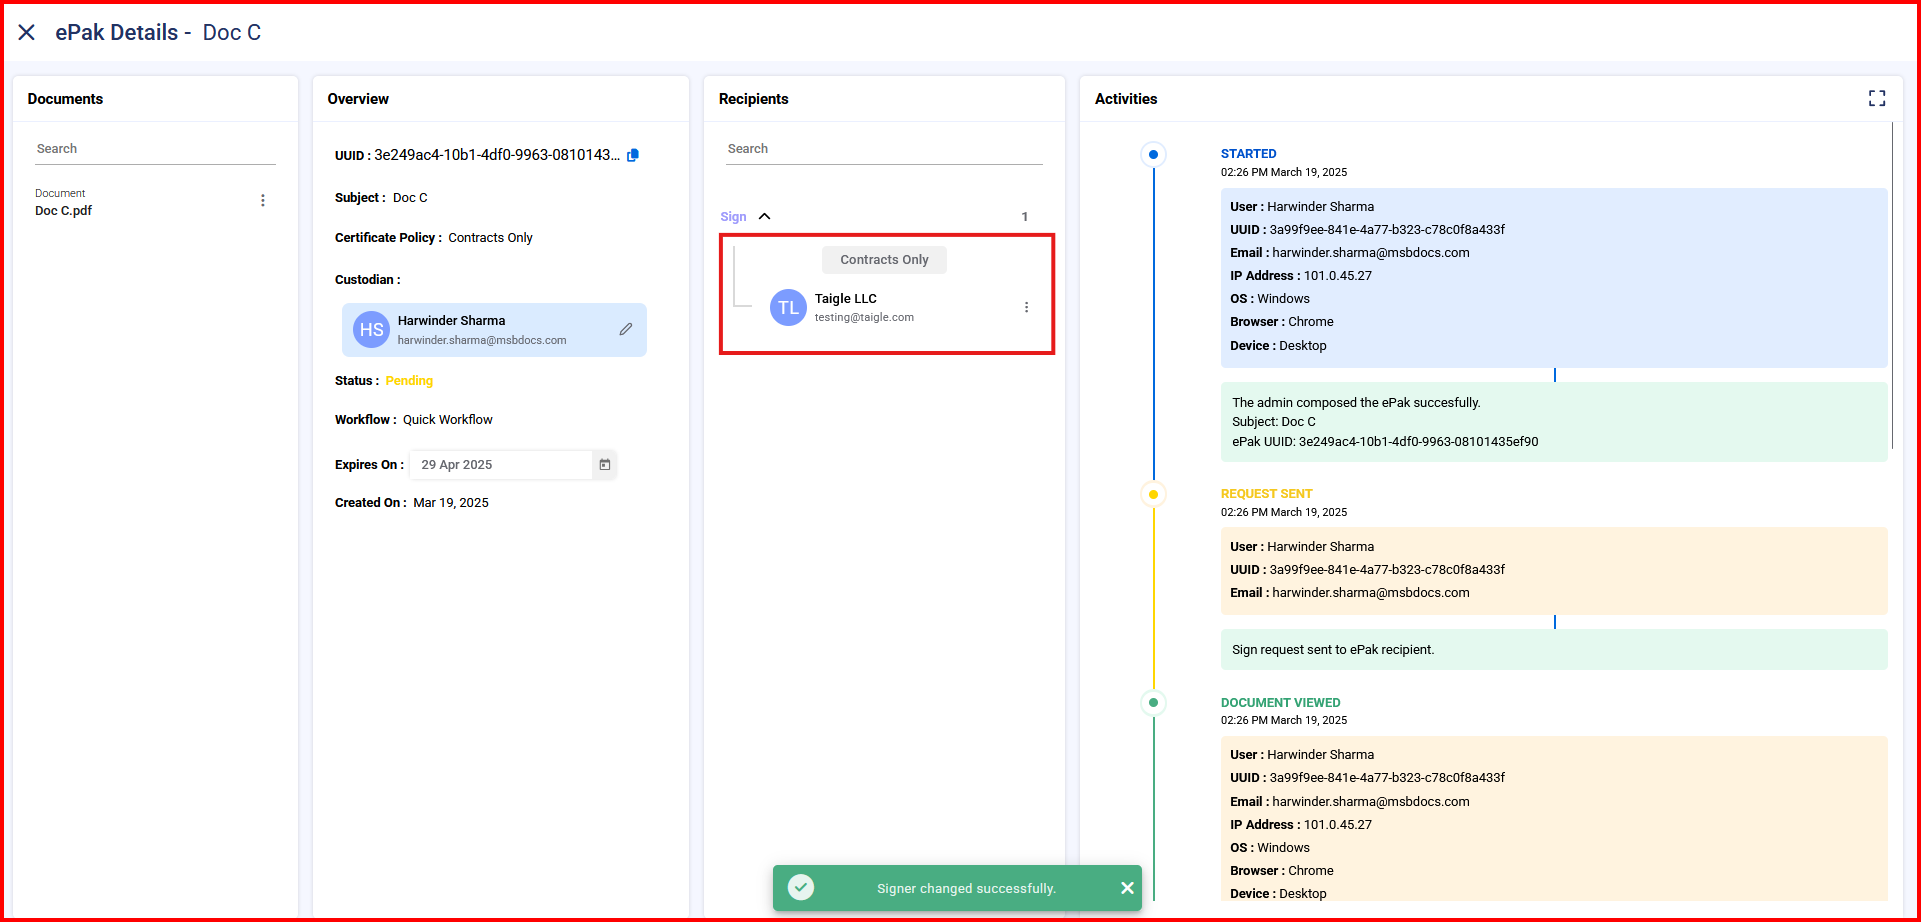
3) Enter the new Signer’s email address and Click Save and the signer will be changed. If the user does not have an account, you may add them by typing in their email address and pressing enter. You will be asked to provide user’s first name, middle name (optional), and last name. MSB displays a success message.

Contact Us
Great, Thank you!
How do I control the order for Signatories using an existing Workflow?
You might need for the ePak to be signed in a specific order. You can control the signature order in a Workflow using Workflow States. Signers in a workflow state cannot sign the ePak until the previous state has been completed. If there are multiple signers within a state, those signers can sign the ePak in any order.
How do I control the order for Signatories using a quick Workflow?
A Custodian can control the signature order in a Quick Workflow using Workflow States. Signers in a Workflow State cannot sign the ePak until the previous state has been completed. If there are multiple signers within a state, they can sign the ePak in any order.
Contact Us
Great, Thank you!
I am not ready to request signatures from Signatories. How do I delay signing of the document?
When you attach a document, it automatically places it in Draft status under My Documents tab in upload pop up box. You can delay signing of the document by leaving the document in Draft status until you are ready to request signatures. When you are ready to request signatures, refer to How do I create an ePak for signature? and simply select the desired draft document from the My Documents tab. The request for signatures gets sent to the signatories via email.
Please note that draft documents are also subject to the document retention period (default is 30 days). Draft documents that are left will be deleted at the end of the retention period.
Contact Us
Great, Thank you!
How do I know when a Signatory rejects a request to sign?
MSB will send an email notification if your ePak is rejected by a Signer or Reviewer. The email will contain the rejection reason and comments from the recipient.
You can also view rejected documents by going into your Stopped folder on the Dashboard or ePaks pages. It will display all the ePaks that you are custodian of that have been rejected. You may select an ePak and then click the Activities tab in the ePak details to view information about the rejection.
How do I know when a Signatory rejects a request to sign?
MSB will send an email notification if your ePak is rejected by a Signer or Reviewer. The email will include the rejection reason and comments from the recipient.
You can also view rejected documents in the Stopped folder under Sent ePaks. It will display all the ePaks that you are custodian of that have been rejected. You may select an ePak and then click the Activities tab in the ePak details to view information about the rejection.
Contact Us
Great, Thank you!
Can I manually complete a pending ePak?
Yes, if configured for your instance – A Custodian, Group Manager or an Administrator may now choose to mark any ePak as completed without requiring signatures from the remaining signers in the workflow. For forceful completion of an ePak it must have at least one signature/review (progress percentage more than 0%) in the assigned workflow.
This feature comes handy when an ePak has all the needed signatures but is still pending because one or more signers are either OOO or not available to sign for any given reason. The custodian can then choose to manually complete the ePak without needing the pending signatures.
To manually complete an ePak:
- Choose an ePak from the Pending folder that has progress percentage of more than 0%.
- Click on ‘Complete ePak’ button in the bottom dock.
- Application will:
- Display a confirmation and move the ePak from your pending folder to the completed folder.
- Send email notification to the pending signer(s) for signing request rescinded.
- An activity will be logged in the ePak’s audit trail for this action.

Can I manually complete a pending ePak?
Yes, if configured for your instance – A Custodian, Group Manager or an Administrator may choose to mark any ePak as completed without requiring signatures from the remaining signers in the workflow. For forceful completion of an ePak it must have at least one signature/review (progress percentage more than 0%) in the assigned workflow.
This feature comes handy when an ePak has all the needed signatures but is still pending because one or more signers are either OOO or not available to sign for any given reason. The custodian can then choose to manually complete the ePak without needing the pending signatures.
To manually complete an ePak:
1) Choose an ePak from the Pending folder that has a progress percentage of more than 0%.
2) Click on ‘Complete ePak’ button on the right corner of the page.
3) Application will:
-Display a confirmation and move the ePak from Pending to the Completed folder.
-Send email notification to the pending signer(s) for signing request rescinded.
-An activity will be logged in the ePak audit trail for this action.

Users can manually complete the ePaks in bulk. An authentication would be required when users select the ePaks to manually complete.

Contact Us
Great, Thank you!
Can I restart a stopped ePak and send it out for signatures again without having to do everything from the scratch?
The ‘Restart ePak’ feature, if configured for your instance will allow you to restart a rejected ePak instead of composing a new ePak from the scratch. The ePak workflow, in this case, is preserved and non-editable. This feature is most useful in case of an ePak with multiple states, multiple documents and multiple signers.
To restart a rejected ePak:
- Go to your stopped folder and access the ePak that you wish to correct and restart.
- Click the restart icon against the ePak name in the list of ePaks to be brought to the compose page with the same workflow ready on the fly.

- In order to begin this process, attach a new document. The Rejected document will travel along with the ePak, but document name will be displayed in red instead.


- Upload a new document (addressing the rejection reason, making any necessary edits), drop signature tags appropriately and click the restart button on the left.
The Signers and Reviewers will then receive the updated ePak for their review and approval/signature. All ePak activities, including ePak document replacement, will be maintained in the Audit Trail for the ePak.
In case of a single document in the ePak, the workflow will start from the very beginning and all the signers/reviewers will have to perform the required action again. However, in case of multiple documents and multiple signers/reviewers, only those signers/reviewers will receive notification that had tags/action assigned on the rejected document.
Can I restart a stopped ePak and send it out for signatures again?
The ‘Restart ePak’ feature, if configured for your instance, will allow you to restart a rejected ePak instead of composing a new ePak from scratch. The ePak workflow, in this case, is preserved and non-editable. This feature is most useful in the case of an ePak with multiple states, multiple documents, and multiple signers.
To restart a rejected ePak:
1) Go to your stopped folder and access the ePak that you wish to correct and restart.
2) Click the Resume icon against the ePak name in the list of ePaks to be brought to the compose page with the same workflow ready on the fly.

3) To begin this process, attach a new document. The Rejected document will travel along with the ePak, but the document name will be displayed as Rejected.

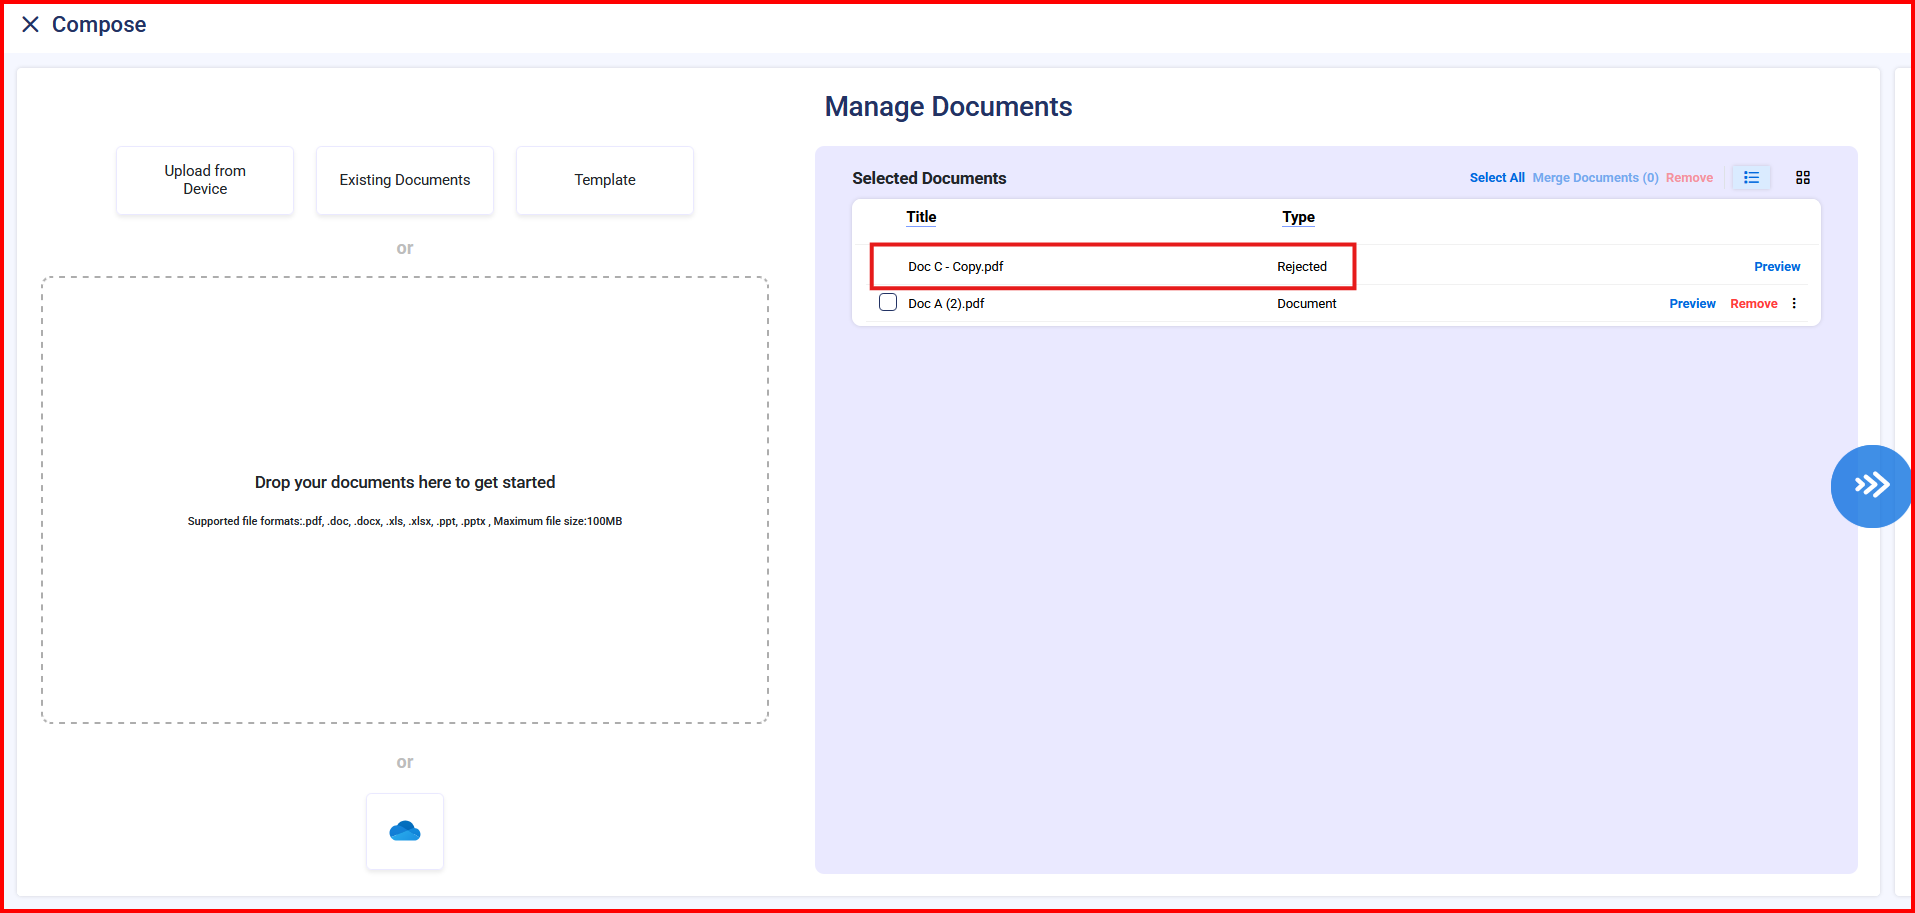
4) Upload a new document (addressing the rejection reason, making any necessary edits), drop signature tags appropriately and click on Send ePak.
The Signers and Reviewers will then receive the updated ePak for their review and approval/signature. All ePak activities, including ePak document replacement, will be maintained in the Audit Trail for the ePak.
In the case of a single document in the ePak, the workflow will start from the very beginning and all the signers/reviewers will have to perform the required action again. However, in case of multiple documents and multiple signers/reviewers, only those signers/reviewers will receive notification that had tags/action assigned on the rejected document.
Contact Us
Great, Thank you!
How do I delete an existing Document Template?
To delete an existing Document Template:
- Go to the Templates page by clicking on the Templates link on the top navigation panel.
- Click the Documents tab.
- Choose from the list of Document templates available.
- Click on ‘x’ sign next to the template name.
- Confirm deletion of the document template.
- It displays a success message.

How do I delete an existing Document Template?
To delete an existing Document Template, Click the Delete button available next to the workflow name. Users will receive a pop up to confirm the deletion of the document template.

Contact Us
Great, Thank you!
How do I add tags for more than one signer in the workflow?
If your Signature Workflow has more than one signer, the additional signers will appear in one row or different based on the states selected. On the compose screen, the currently selected username/document turns yellow and all the others will show blue.

To configure tags for multiple signers (refer to the image above):
- Select the signer from the available list. The Icon turns yellow only for the selected signer.
- Based on the certificate policy and system configuration, you will see a list of tags available on the top of the document preview panel.
- Select a tag from the list and drag the tag icon to the desired location on the document and a pointer with the signer’s name appears towards left of the document indicating which tag is for which signatory.
- Click the next signer in the list; the selected signer will now turn yellow and the previously selected signer will turn blue and Repeat step 2 for each signer. Please note that you may add a signer to more than one state in a workflow (in separate states). You will need to place a signature tag and/or others for the signer each time they appear in the workflow.
- Any previously dropped signature tag and others on the document will get greyed out.
- Similarly, if you have multiple documents, repeat the same procedure as mentioned above so that there is one signature tag on at least one document per signer.
- Once you have successfully configured all signature tags and/or other tags, click send to create the ePak and request Signatures.
- If you have not configured signature tag for all signers when you click the Send button, it will warn you that you have not completed all signature tags.
How do I add tags for more than one signer in the workflow?
If your Signature Workflow has more than one signer, the additional signers will appear in one row or different based on the states selected. The currently selected username turns blue and all the others are not highlighted in any colour.

To configure tags for multiple signers (refer to the image above):
- Select the signer from the available list. The Icon turns blue only for the selected signer.
- Based on the certificate policy and system configuration, you will see a list of tags available.
- Select a tag from the list and drag the tag to the desired location on the document and the signer’s name appears on the top of the tag indicating which tag is for which signatory.
- Click the next signer in the list; the selected signer will now turn blue. Repeat step 2 for each signer. Please note that you may add a signer to more than one state in a workflow (in separate states). You will need to place a signature tag and/or others for the signer each time they appear in the workflow.
- Any previously dropped signature tag and others on the document will get greyed out.
- Similarly, if you have multiple documents, repeat the same procedure as mentioned above so that there is one signature tag on at least one document per signer.
- Once you have successfully configured all signature tags and/or other tags, click send to create the ePak and request Signatures.
- If you have not configured signature tag for all signers when you click the Send button, it will warn you that you have not completed all signature tags.

Contact Us
Great, Thank you!
How do I add signature tags if I have uploaded multiple documents at once?
If you have selected multiple documents while creating an ePak on Compose page, it will display all the documents in a row on top of the eSignature tag configuration screen.

To configure signature tags for each document:
- Select the document you wish to configure, and the selected Document will turn yellow while others will be blue.
- Configure signature tags for the selected document (see How do I add signature tags for more than one signer?).
- Repeat the step 1 and 2 for each uploaded document.
- Then click the Send button on the top left of the screen to create the ePak and request signatures.
How do I add signature tags if I have uploaded multiple documents at once?
If you have selected multiple documents while creating an ePak, it will display all the documents on the drop tags screen.
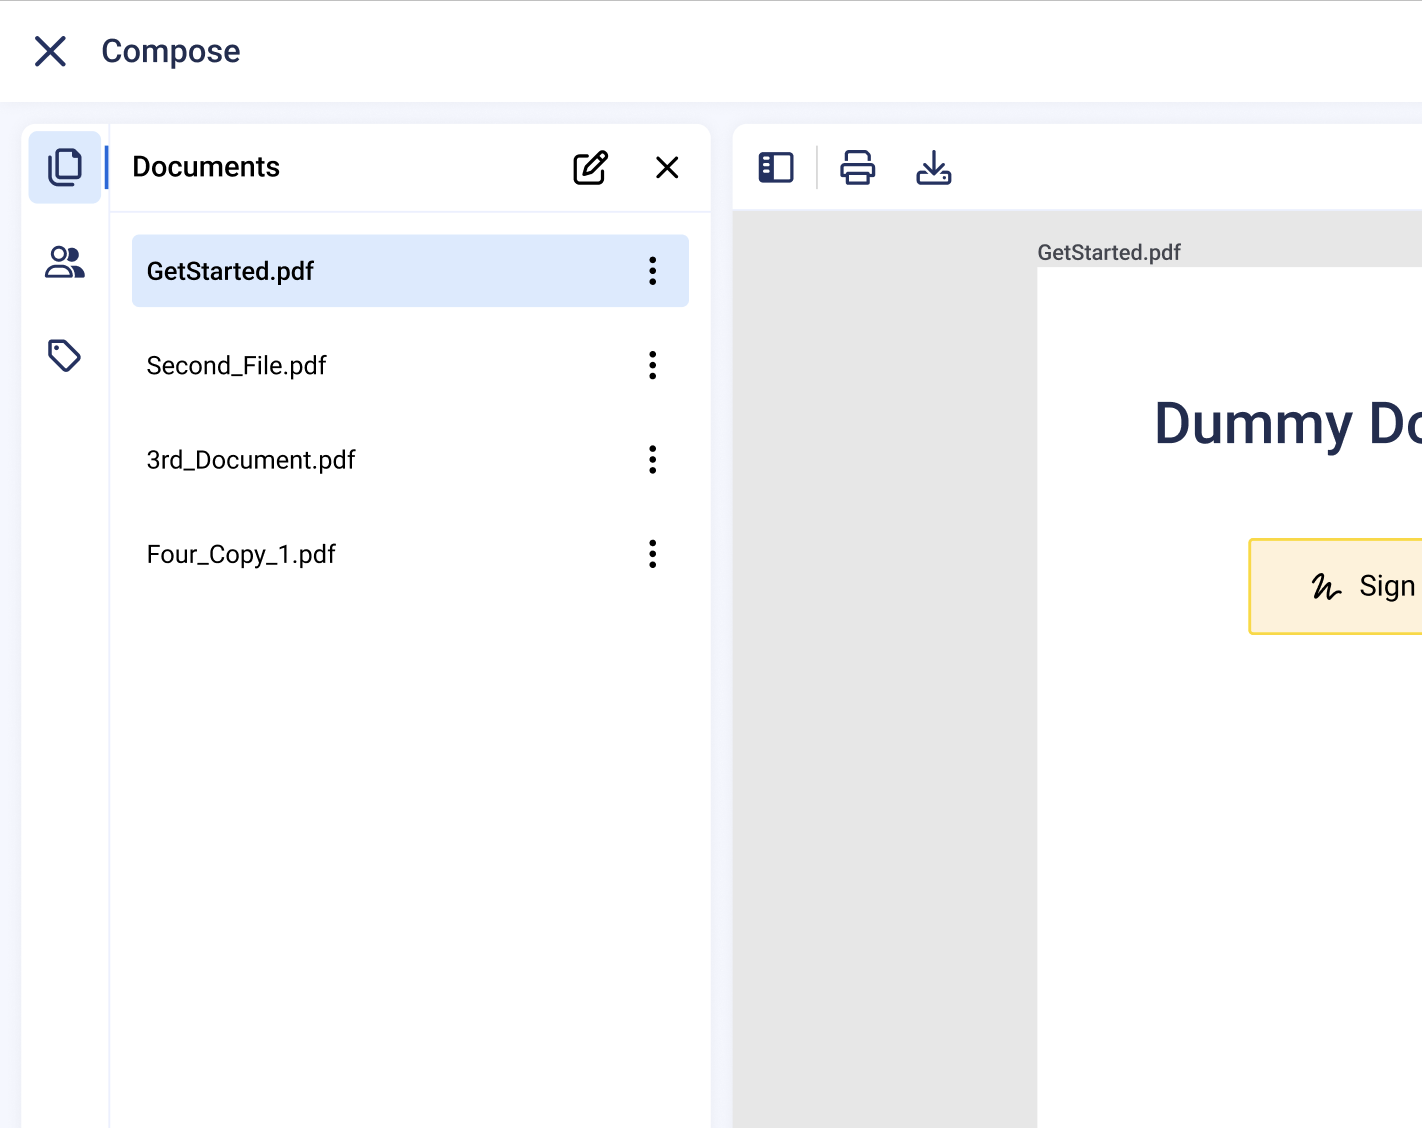
To configure signature tags for each document:
- Select the document you wish to configure, and the selected Document will turn blue.
- Configure signature tags for the selected document.
- Repeat the step 1 and 2 for each uploaded document.
- Then click the Send button to create the ePak and request signatures.
Contact Us
Great, Thank you!
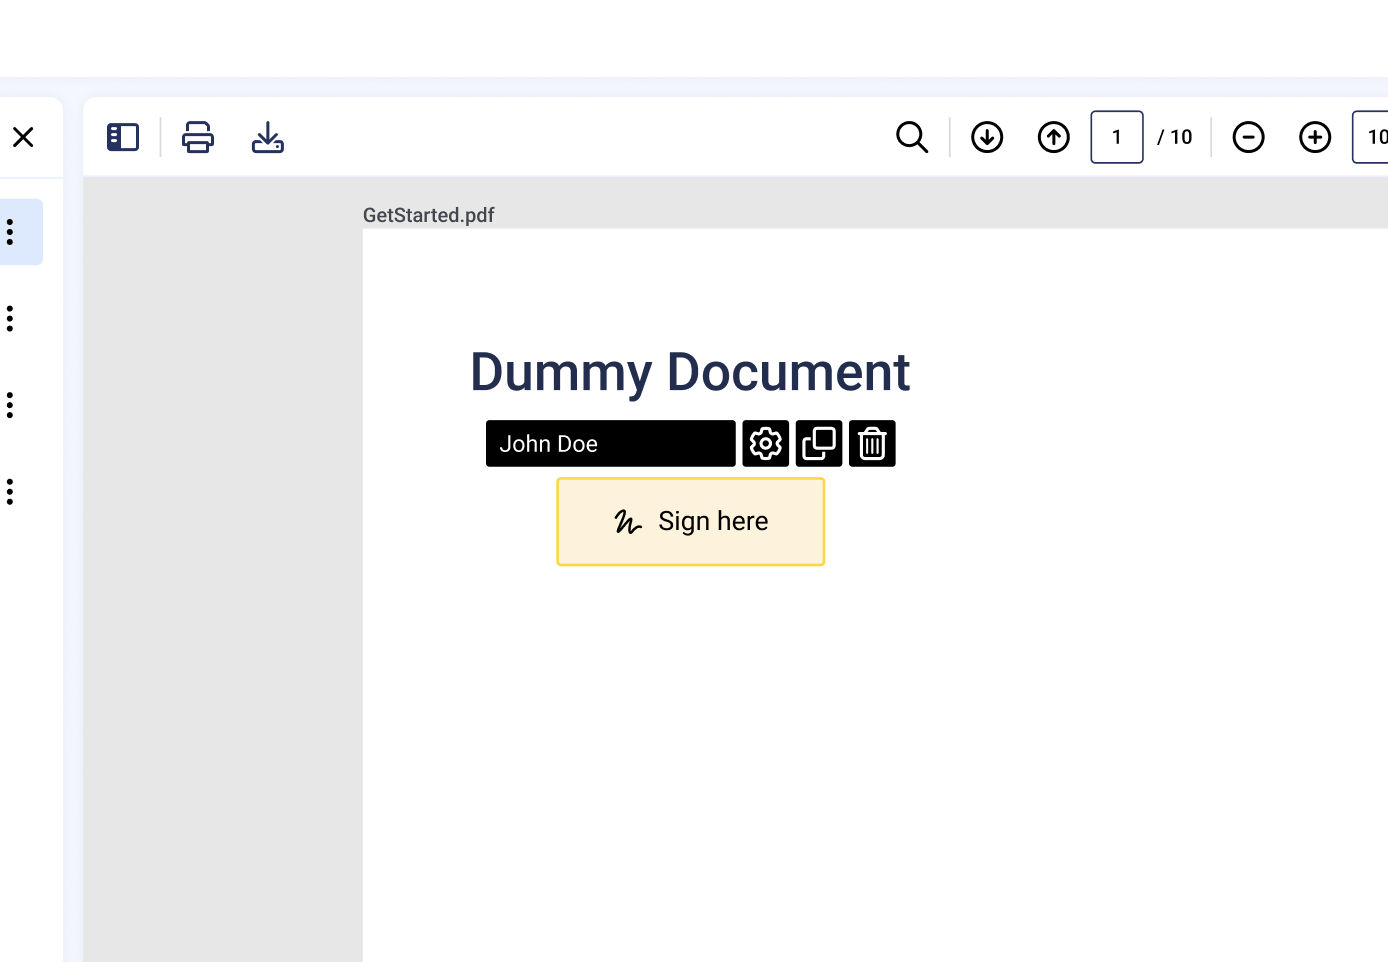
How do I delete a tag that I have dropped on the document?
To delete a tag, click it to activate it. An active tag will have a blue dotted line and all the additional controls will appear in the Tag Resize Panel to the right of the document. Click the ‘Delete Tag’ button in the panel to delete the tag.

How do I delete a tag that I have dropped on the document?
To delete a tag, click it to activate it. Once the tag is activated, the delete button will appear on the tag along with the signer details. User can also click on the gear icon and all the additional controls will appear in the fileds details panel on the right of the document. Click the ‘Delete Tag’ button in the panel to delete the tag.