Is there a deadline for signing an ePak?
The Document Custodian may have set an expiration date on an ePak that they’ve sent to you. You can view the expiration date in your Inbox. If the expiration date passes, you will no longer be able to access and sign the ePak.
If the Document Custodian chose not to set an expiration date, then by default you have 30 calendar days to sign the ePak. After 30 days, MSB deletes the ePak, whether it is signed or not. This 30-day Retention period may differ depending on your Institution’s configuration at the time of deployment. Check with your Administrator to see if your Institution is not using the 30-day default period.
Note: MSB can now be configured to set expiration and retention dates for an ePak either from the last action date or the ePaks create date. This is a system level configuration and cannot be controlled by individual users.

Contact Us
Great, Thank you!
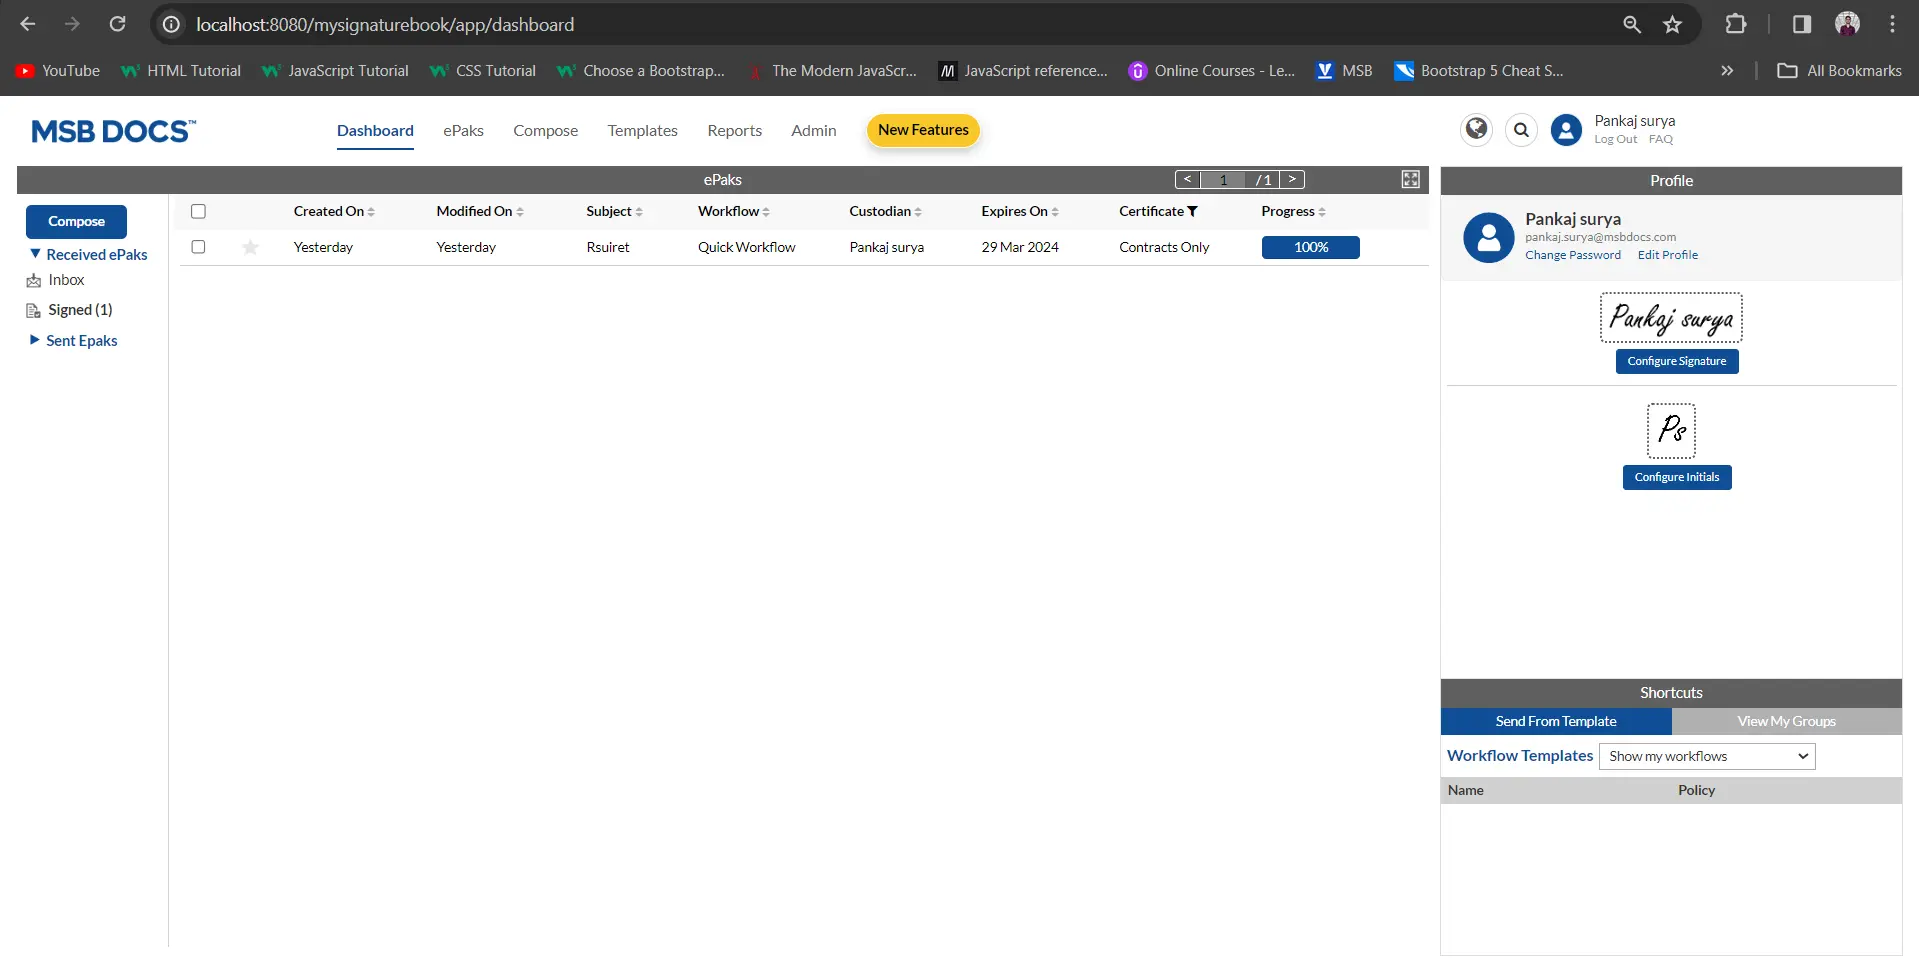
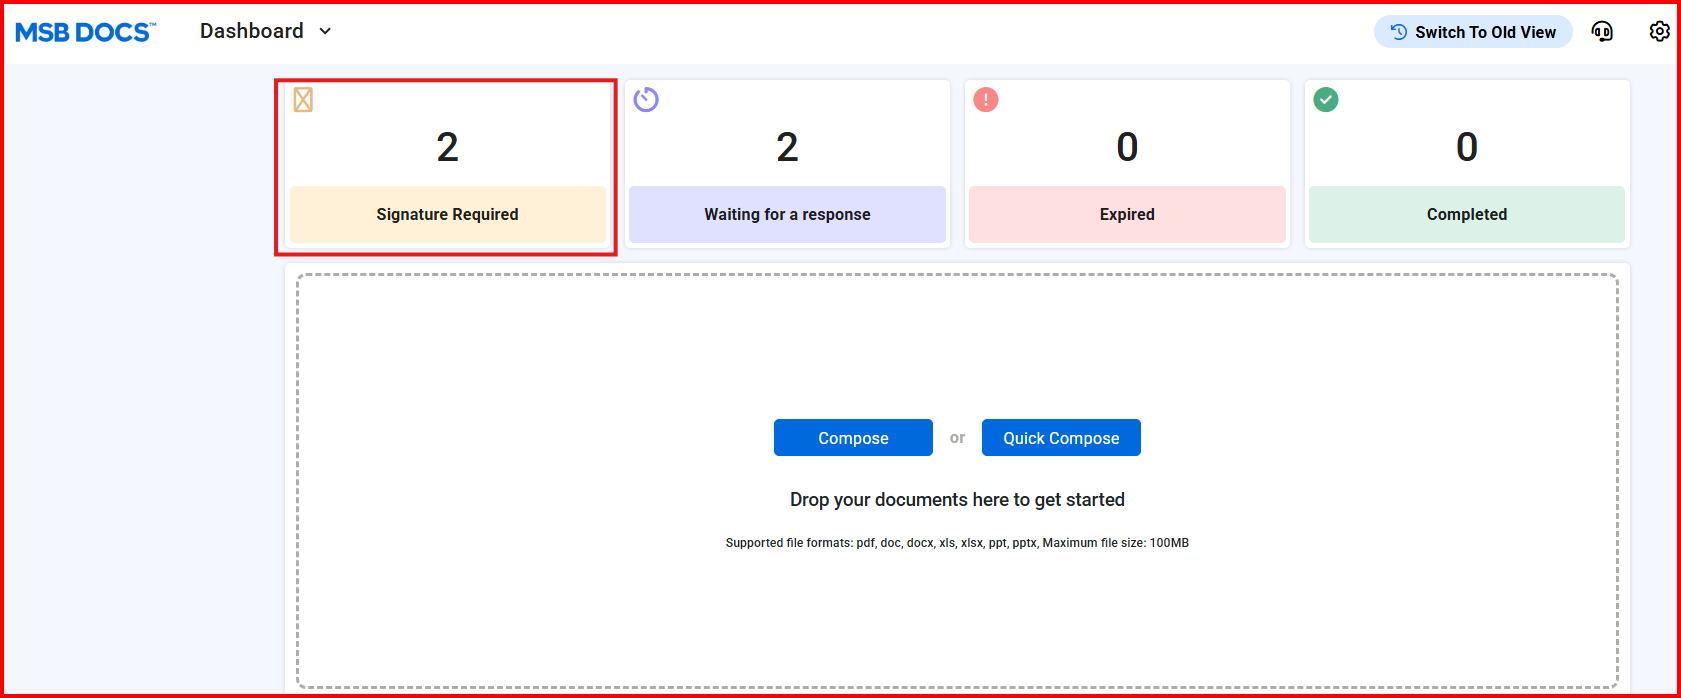
How do I sign an ePak?
Signing an ePak involves selecting the ePak to sign, reviewing it, adding any desired comments, and then applying your electronic and digital signatures to it. You may access your ePaks either through the ePaks link on the top navigation panel or from the ePak folders on your Dashboard.
The steps are listed below.
- Log into your account.
- Visit the ePaks page or Dashboard page.
- Click the Inbox.
- Select the ePak you wish to sign and the ePak will open in the ePak preview panel.

- Review the ePak document(s) in the ePak preview panel.
- Click the Start button. Signature tags will appear. A blue arrow will point to the first tag that needs your attention. Click on the current tag to complete it. Then click the Next button at the bottom of the screen to move to the next tag. The blue arrow will point to the next tag. (Pressing the Previous button will move the screen and the blue arrow back to the previous tag). Once all tags have been completed, click the Finish button at the bottom of the screen.
Note- If the document contains no fillable tag but only a signature tag(s), you will see a ‘SIGN’ button instead of the ‘START’ button. You must click on the sign button to automatically apply your signature. This will be applicable for all policies configured for your instance.


- If a pop up appears, fill out the fields in the form.
- If the ePak is using a Safe UIS you will need to enter your Universal Identification Service username and password, a one-time password, and grant permission to use your certificate to sign on your behalf (Your Safe credentials may differ from your app credentials. Your SAFE credentials must be setup separately via the SAFE-BioPharma Verizon Universal Identification Services (UIS) system. Contact your company’s representative for information and help to set up your SAFE credentials if you have not already done so). Once you have completed authentication through the Verizon Universal Identification Service, you may select a Signing reason or enter a free text signing reason (if configured), enter an optional comment and agree to the terms & condition of signing.
- If the ePak is using Safe eToken, your SAFE eToken device must be plugged in while you apply signatures and then you will need to enter your SAFE Pin, an optional comment and agree to the terms & condition of signing.
- If the ePak is using an Internal Certificate, enter your username, certificate PIN and agree to the terms & condition of signing. You may enter an optional comment. (If you do not have an Internal Certificate, go to your Profile page and request one by clicking the Generate CSR link to request one).
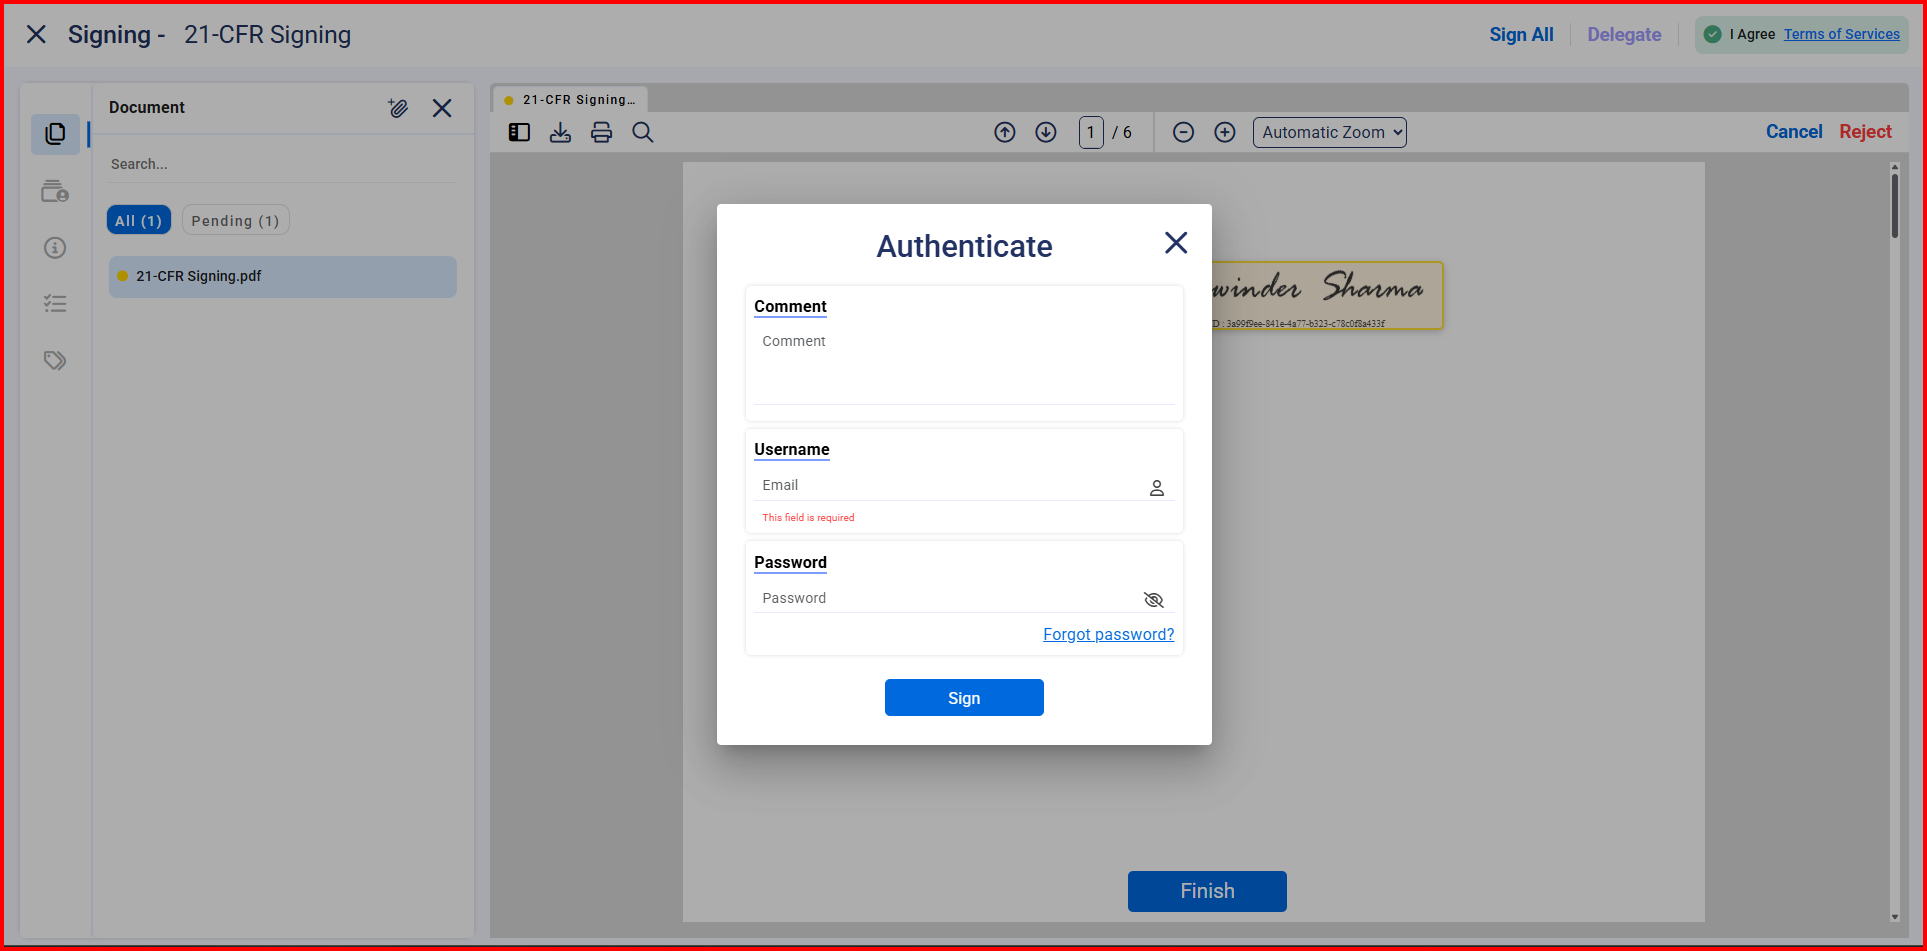
- If the ePak is using a Signatures 21 CFR policy, enter your username and password, any optional comments, and check the box indicating that you agree to the terms and conditions.
- If the ePak is using Contracts Only Policy, you would just need to confirm your signing action. However, if your instance has been configured to ask for a passcode- you would need to enter your signing passcode (password), agree to the terms & conditions of signing and then apply signatures.
You must repeat this process for every document within the ePak in order to complete the signing of the ePak. Once the ePak is complete, it will move from your Inbox folder into your Signed folder.
How do I sign an ePak?
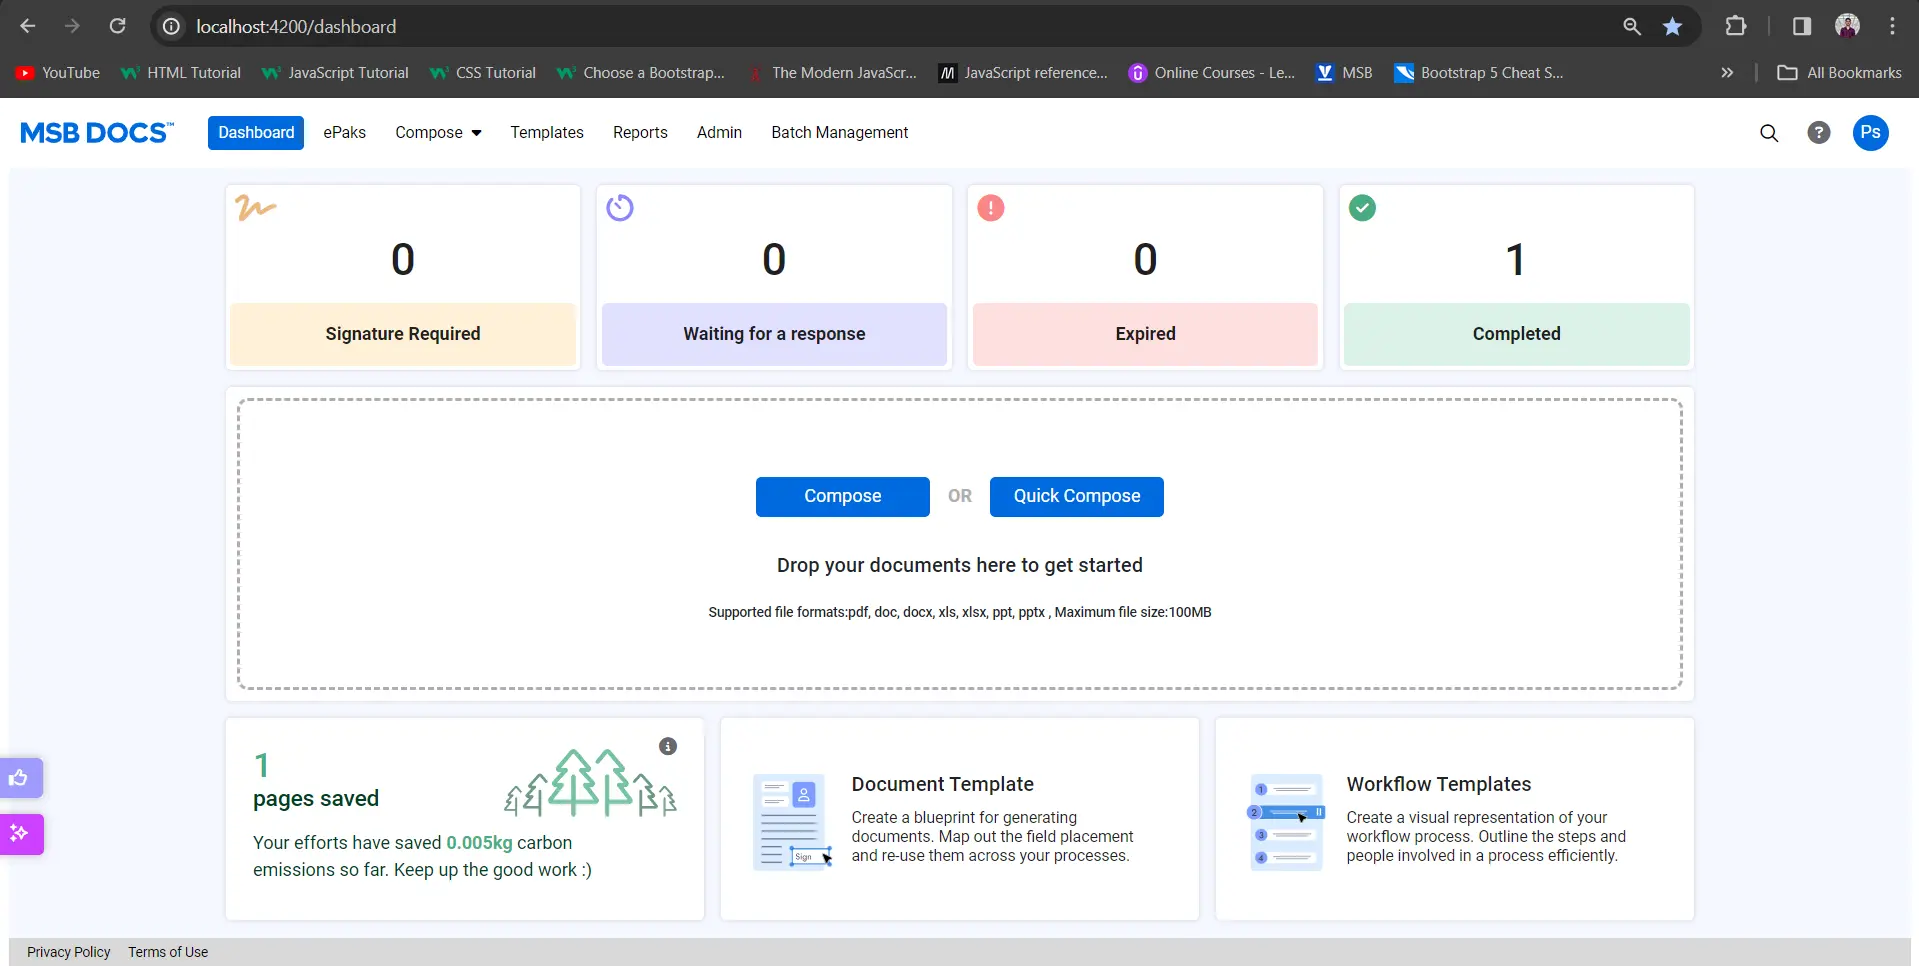
Signing an ePak involves selecting the ePak to sign, reviewing it, adding any desired comments, and then applying your electronic and digital signatures to it. You may access your ePaks either through the ePaks link on the top navigation panel or by clicking “Signature Required” on your Dashboard.
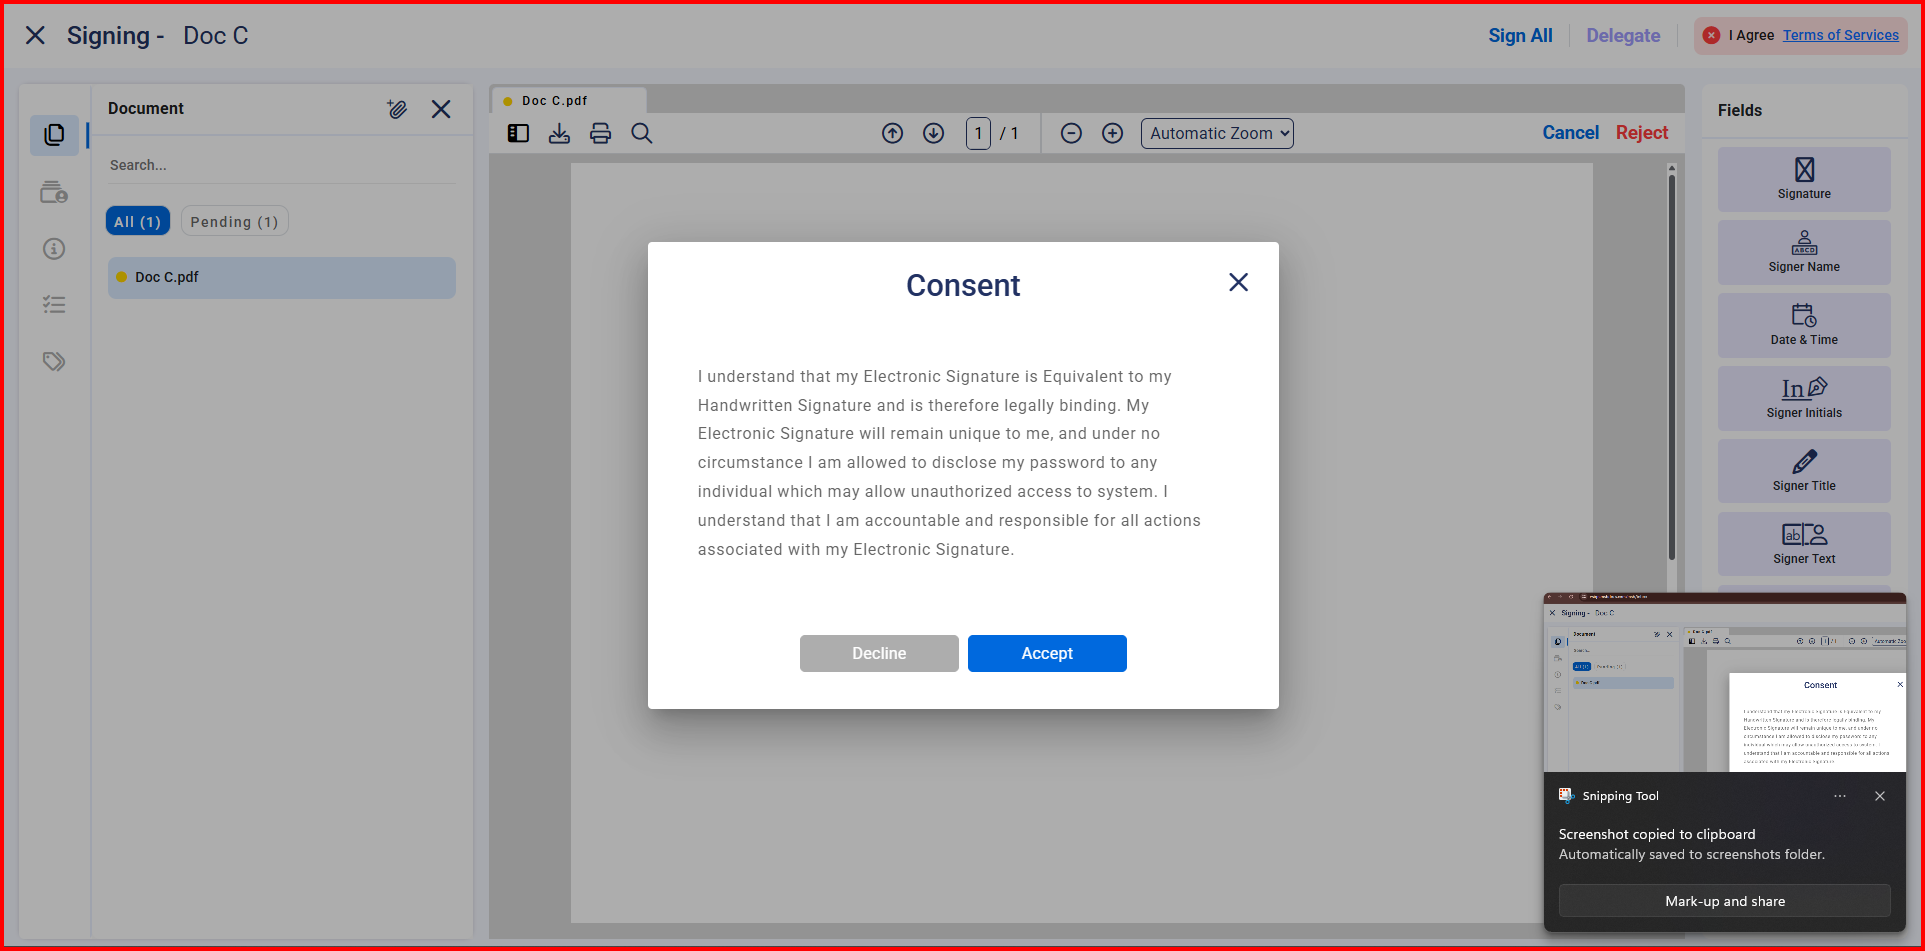
Review the ePak document(s) in the ePak preview panel. Click on Sign and Accept the Consent. Signature tags will appear. Click on the current tag to complete it. Then click the Next button at the bottom of the screen to move to the next tag. Pressing the Previous button will move the screen. Once all tags have been completed, click the Finish button at the bottom of the screen.
If the ePak is using a Signatures 21 CFR policy, enter your username (email address) and password, any optional comments, and check the box indicating that you agree to the terms and conditions. You must repeat this process for every document within the ePak to complete the signing of the ePak. Once the ePak is complete, it will move from your Inbox folder into your Signed folder.
MSB users can access a ‘Forgot Password’ link on the 21CFR authentication modal if EasySign is enabled for 21CFR policy. When user clicks the forgot password link, user will get redirected to the same place as the forgot password link on the main login form.
Contact Us
Great, Thank you!
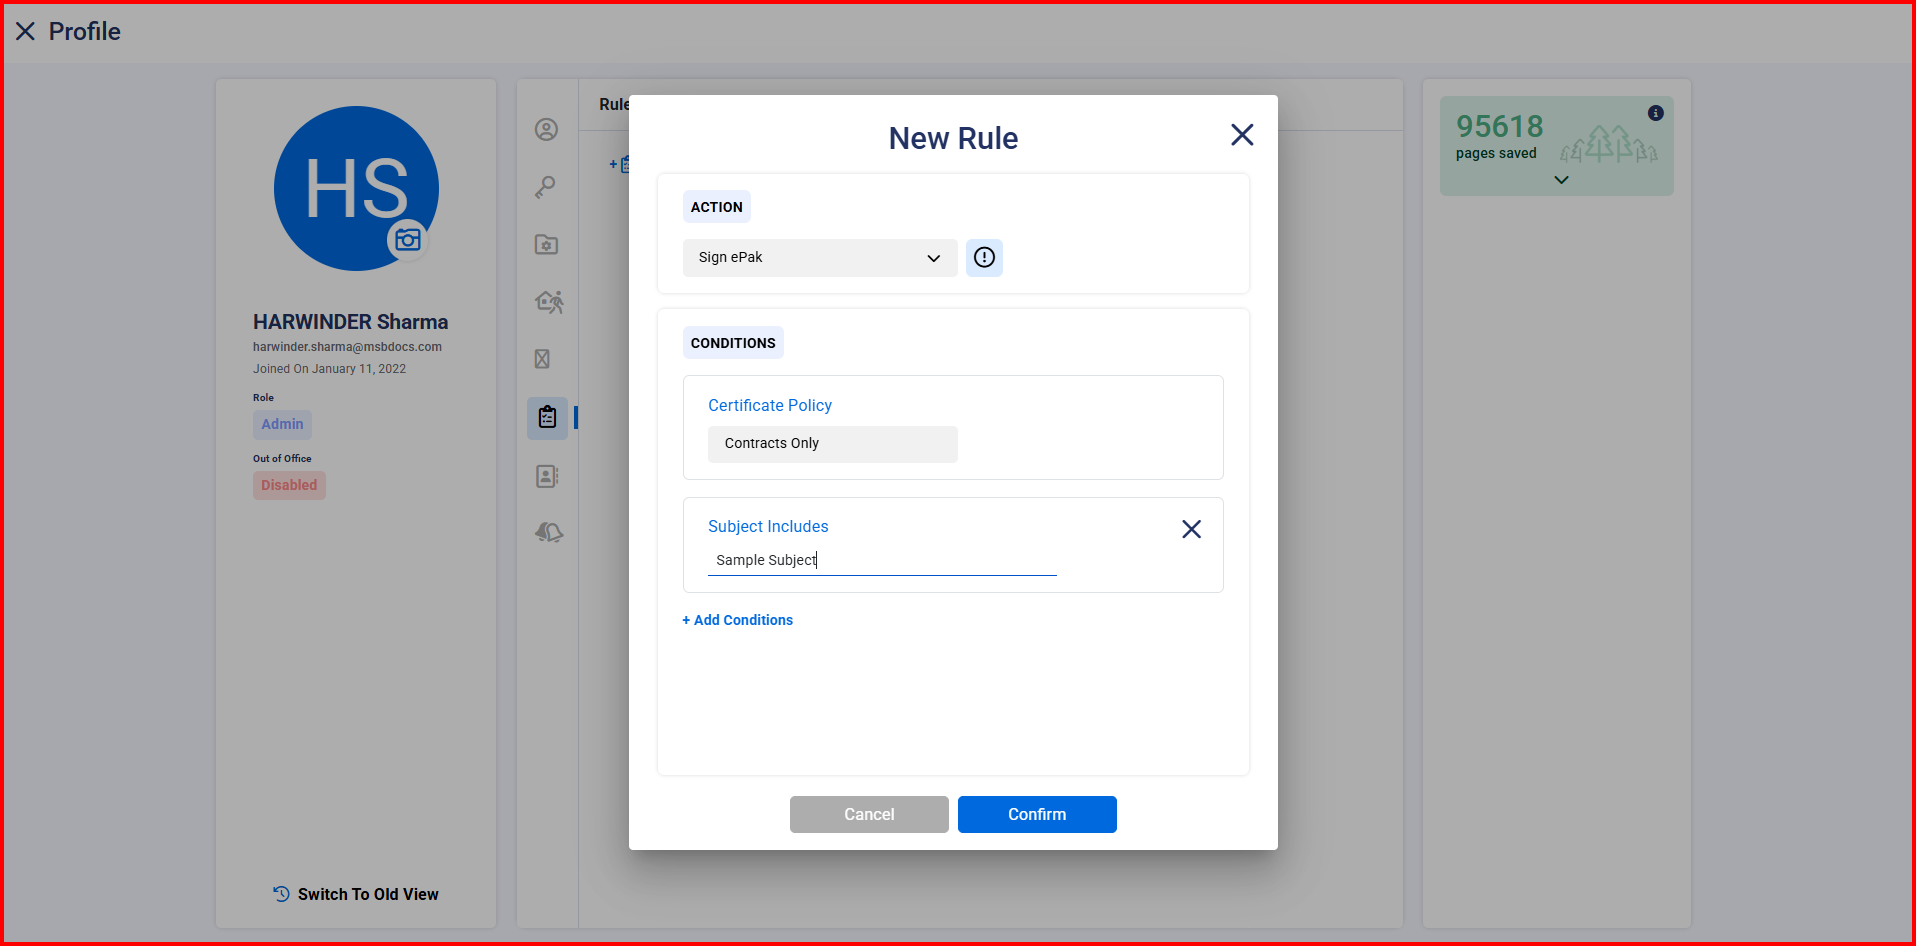
How do I create rules to sign an ePak automatically?
If the tenant is configured, Users will be able to configure smart rules from their profile for the automated signing of Contracts Only ePaks, streamlining the process to sign the ePaks automatically. If User A wants the epaks sent by User B to get auto signed, the User A should create a rule that matches the incoming Epak from User B. Users can create, edit, or delete an existing smart rule. A rule can be created based on the subject of the incoming ePak and/or the owner of the ePak.
Contact Us
Great, Thank you!
Can I Bulk Sign ePaks that Require Input from me?
If Bulk Signing is enabled on your instance, Signers may choose to bulk sign ePaks. Bulk Signing allows a Signer to sign multiple ePaks in a batch.
To Bulk Sign ePaks:
- Select the ePaks which you wish to Bulk Sign.You may choose a group of ePaks by selecting multiple checkboxes in your Inbox.

Alternatively, you may choose to select all ePaks in your Inbox by clicking the “Select all…” link at the top of your ePaK list.

- Once you have made your selection of ePaks you wish to sign, then click the Bulk Sign button.It will then initiate the Bulk Signing process.
If you select ePaks in your Bulk Signing batch which require input from you, those ePaks will be skipped and will remain in your inbox. ePaks that require your input are ePaks that contain tags such as Signer Text or other tags which cannot be auto populated using data already in your Profile. These ePaks will be noted in the Bulk Signing Summary which is displayed after processing the batch.

Can I Bulk Sign ePaks that Require Input from me?
If Bulk Signing is enabled on your instance, Signers may choose to bulk sign ePaks and sign multiple ePaks in a batch. To Bulk Sign, Select the ePaks you wish to Bulk Sign. You may choose a group of ePaks by selecting multiple checkboxes in your Inbox. Alternatively, you may choose to select all ePaks in your Inbox by clicking the “Select all…” link at the top of your ePak list. Once you have made your selection of ePaks you wish to sign, then click the Bulk Sign button. It will then initiate the Bulk Signing process.
MSB users can also bulk sign ePaks with a DSC Token by selecting the desired ePaks and clicking on the Bulk Sign option. After selecting the reason and providing their consent, the users will be able to click on Sign to proceed further where they are greeted by another pop-up asking them to fill-in the PIN for their attached DSC Token. After Successfully filling in the PIN, the bulk signing process will begin, and user will be able to see the summary of the bulk sign process. Bulk Sign with DSC Token will only work for ePaks whose documents only have signature fields.

If you select ePaks in your Bulk Signing batch which require input from you, those ePaks will be skipped and will remain in your inbox. ePaks that require your input are ePaks that contain tags such as Signer Text or other tags which cannot be auto populated using data already in your Profile. These ePaks will be noted in the Bulk Signing Summary which is displayed after processing the batch.
Contact Us
Great, Thank you!
Can I give feedback on MSB Web Application?
Users will now have an option to give feedback about their experience on MSB Web Application by clicking on a designated button and filling out a form.

Contact Us
Great, Thank you!
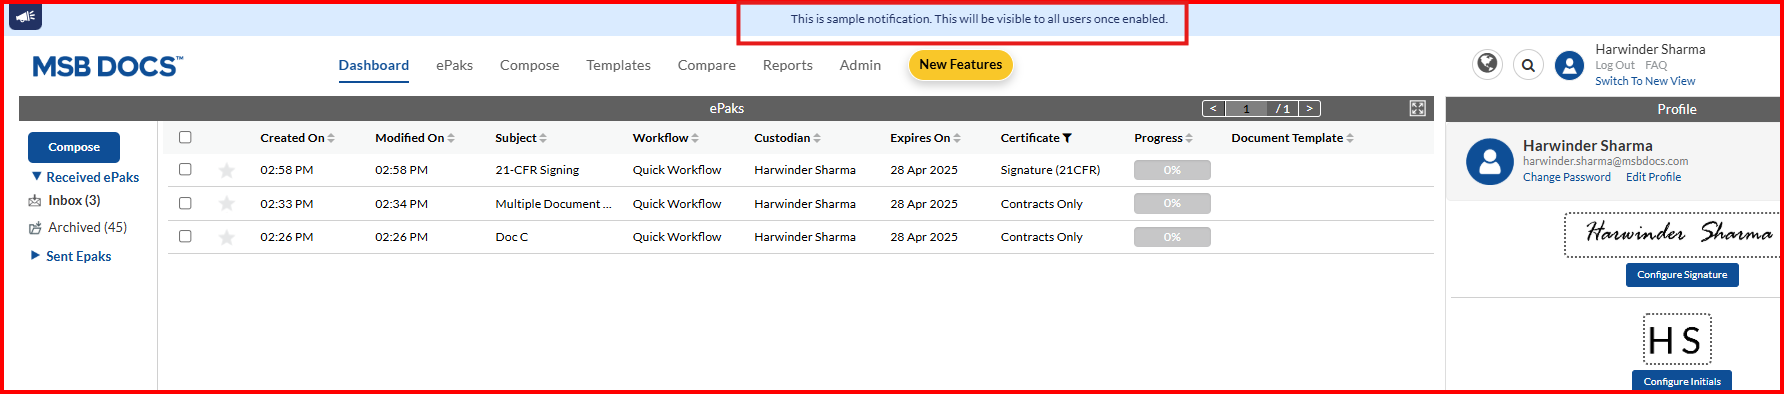
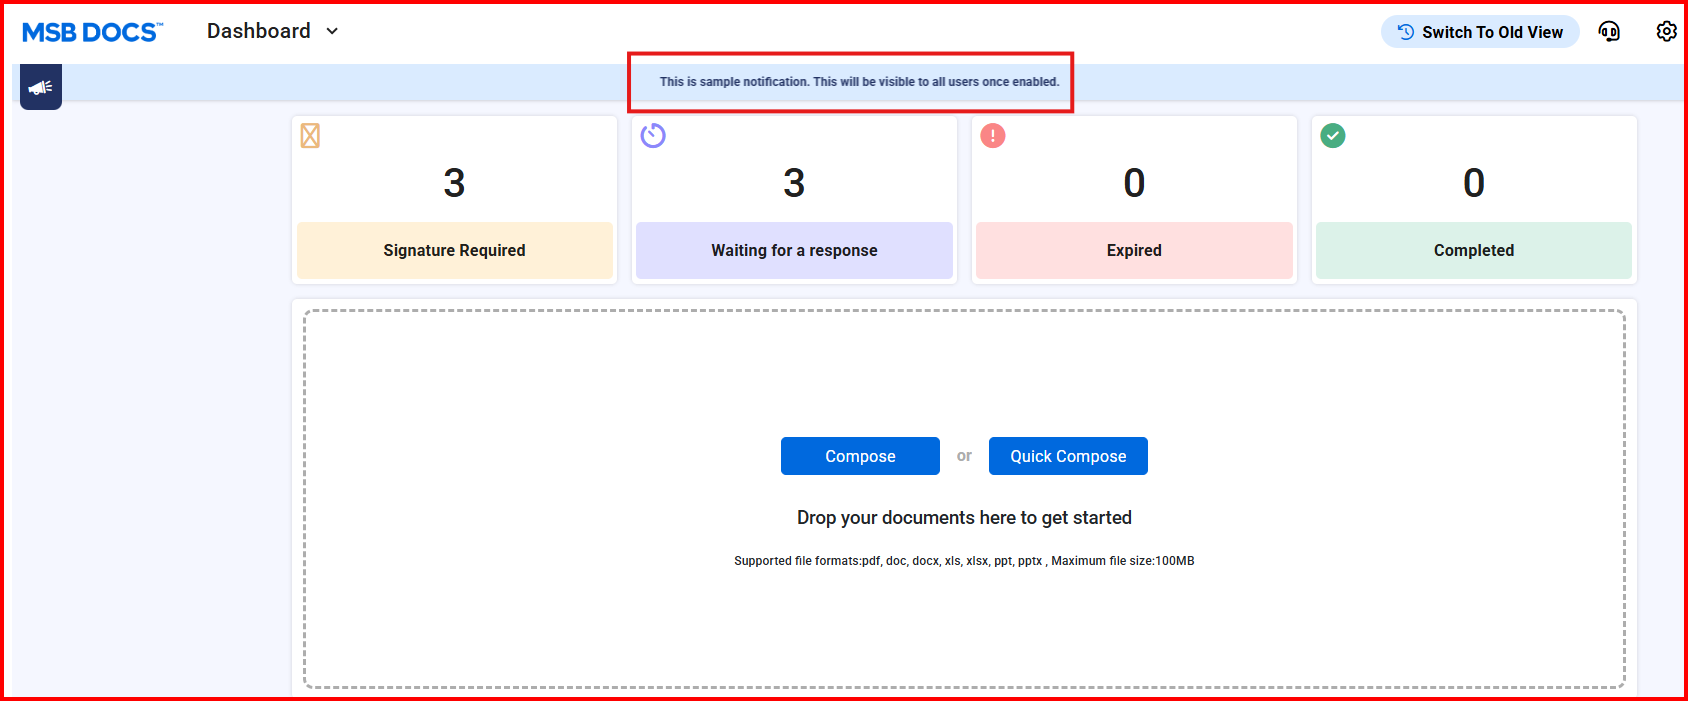
Can a user view important notifications on MSB Web Application?
MSB users can see important notifications related to a system upgrade displayed on the MSB login and Dashboard page. The information will be displayed to all the users in that environment in the form of a banner. MSB can be configured to show the notification or not.
Contact Us
Great, Thank you!
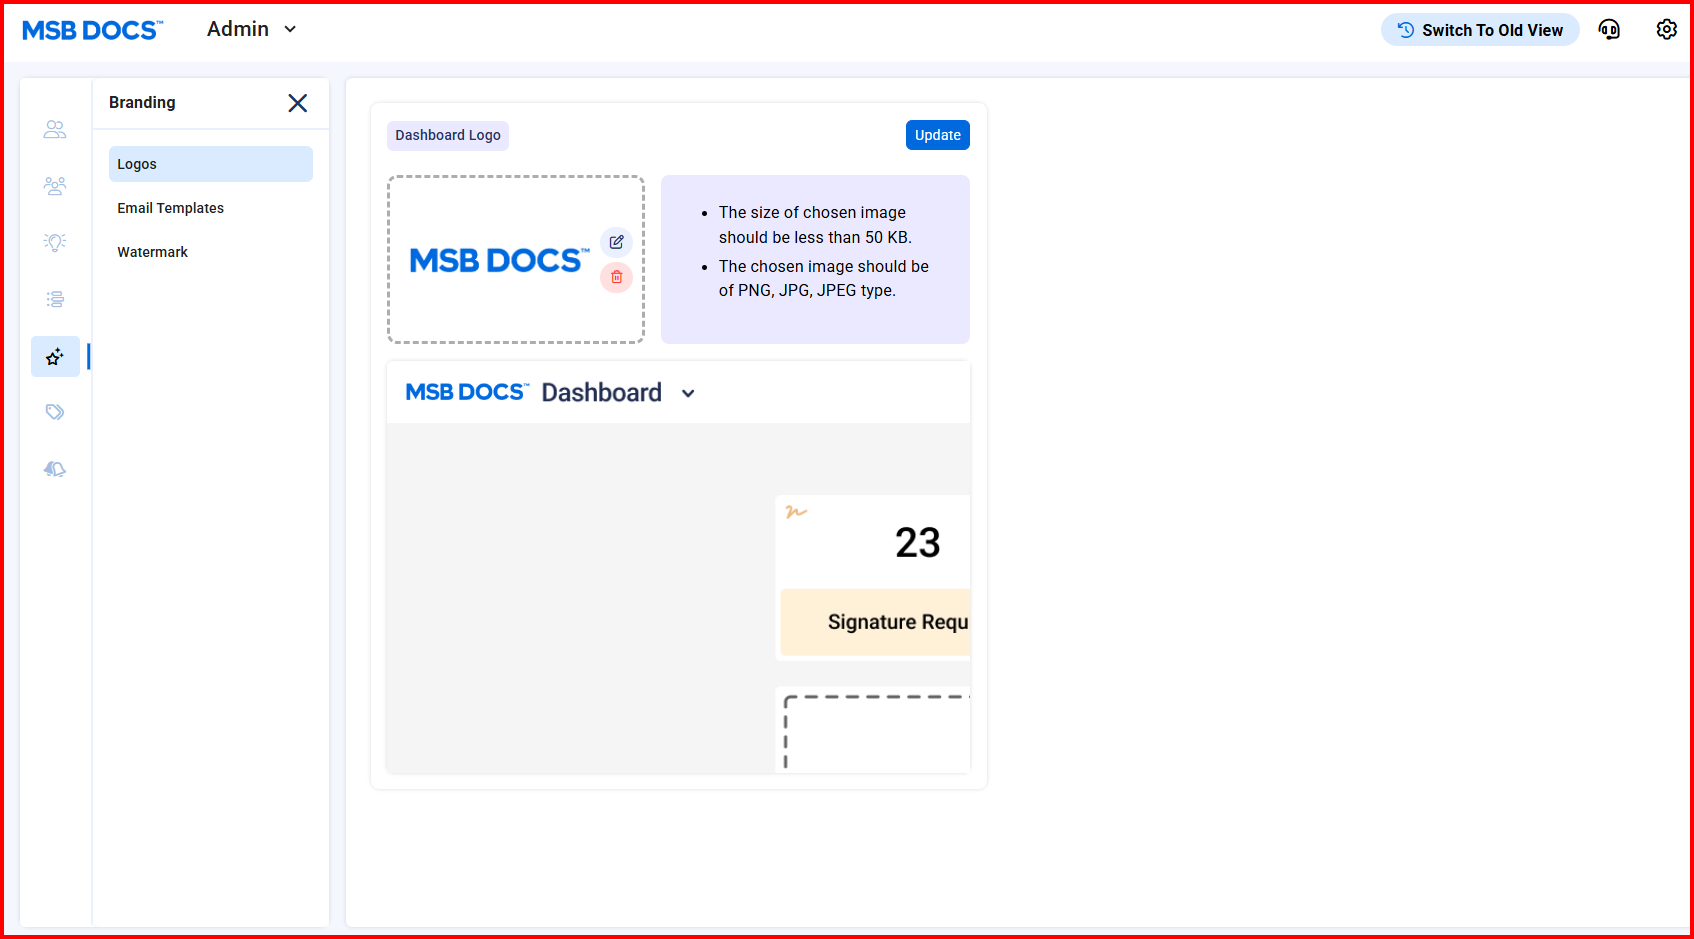
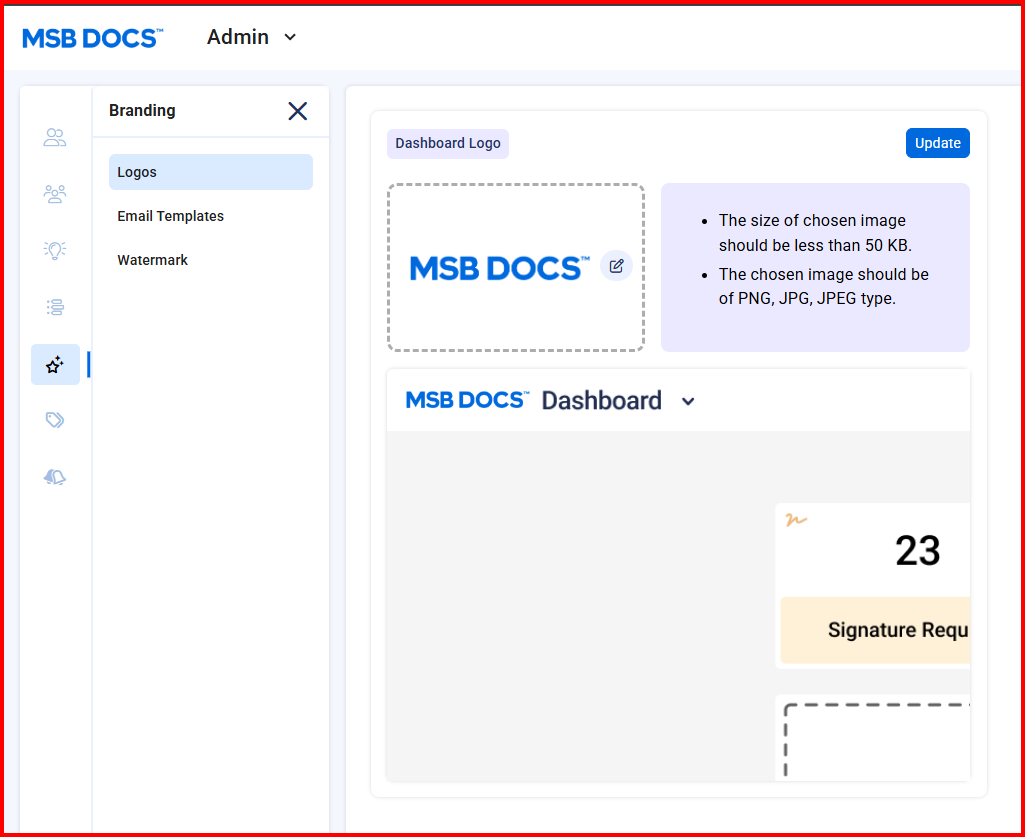
Can the logos on the dashboard be updated?
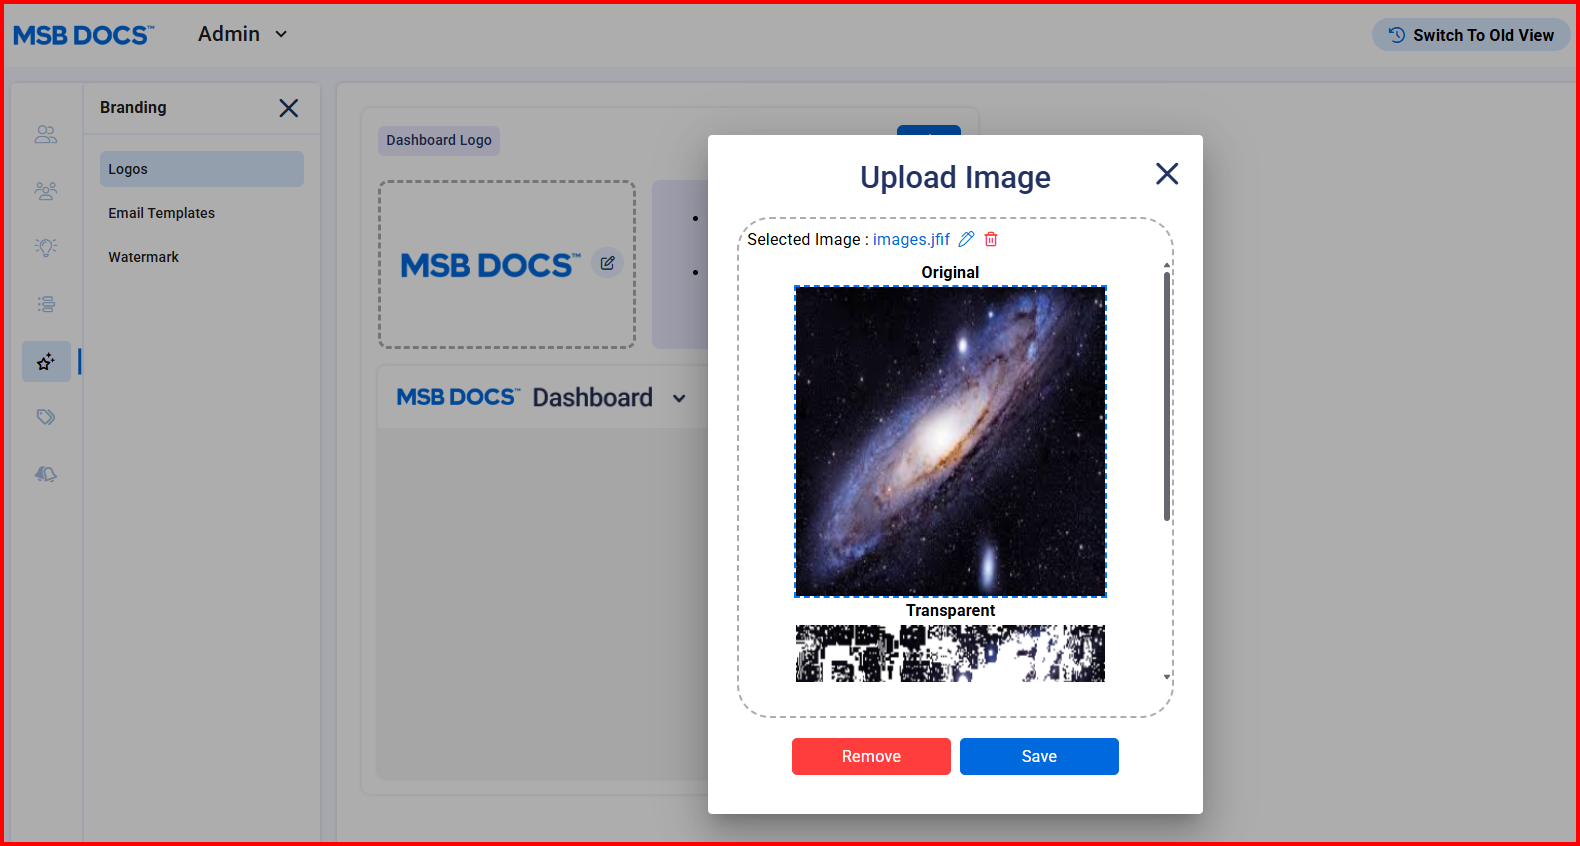
Admin users will have the ability to update the dashboard logo of the MSB application, enabling them to craft a customized user experience. On the Admin page, users can see the Dashboard Logo dialog box to upload the image and on dashboard in Place of MSB logo, the new updated logo is displayed. Admin users will be able to upload a new image for the logo, delete the uploaded image and set the dashboard logo back to the default MSB image.

Users can upload an image, crop, or remove the uploaded image and then click on Save or remove. Once the image is uploaded, the preview of the updated logo will be visible. Users have an option to set the Logo or uploaded image back to the default MSB image by clicking a button to reset it.
Contact Us
Great, Thank you!
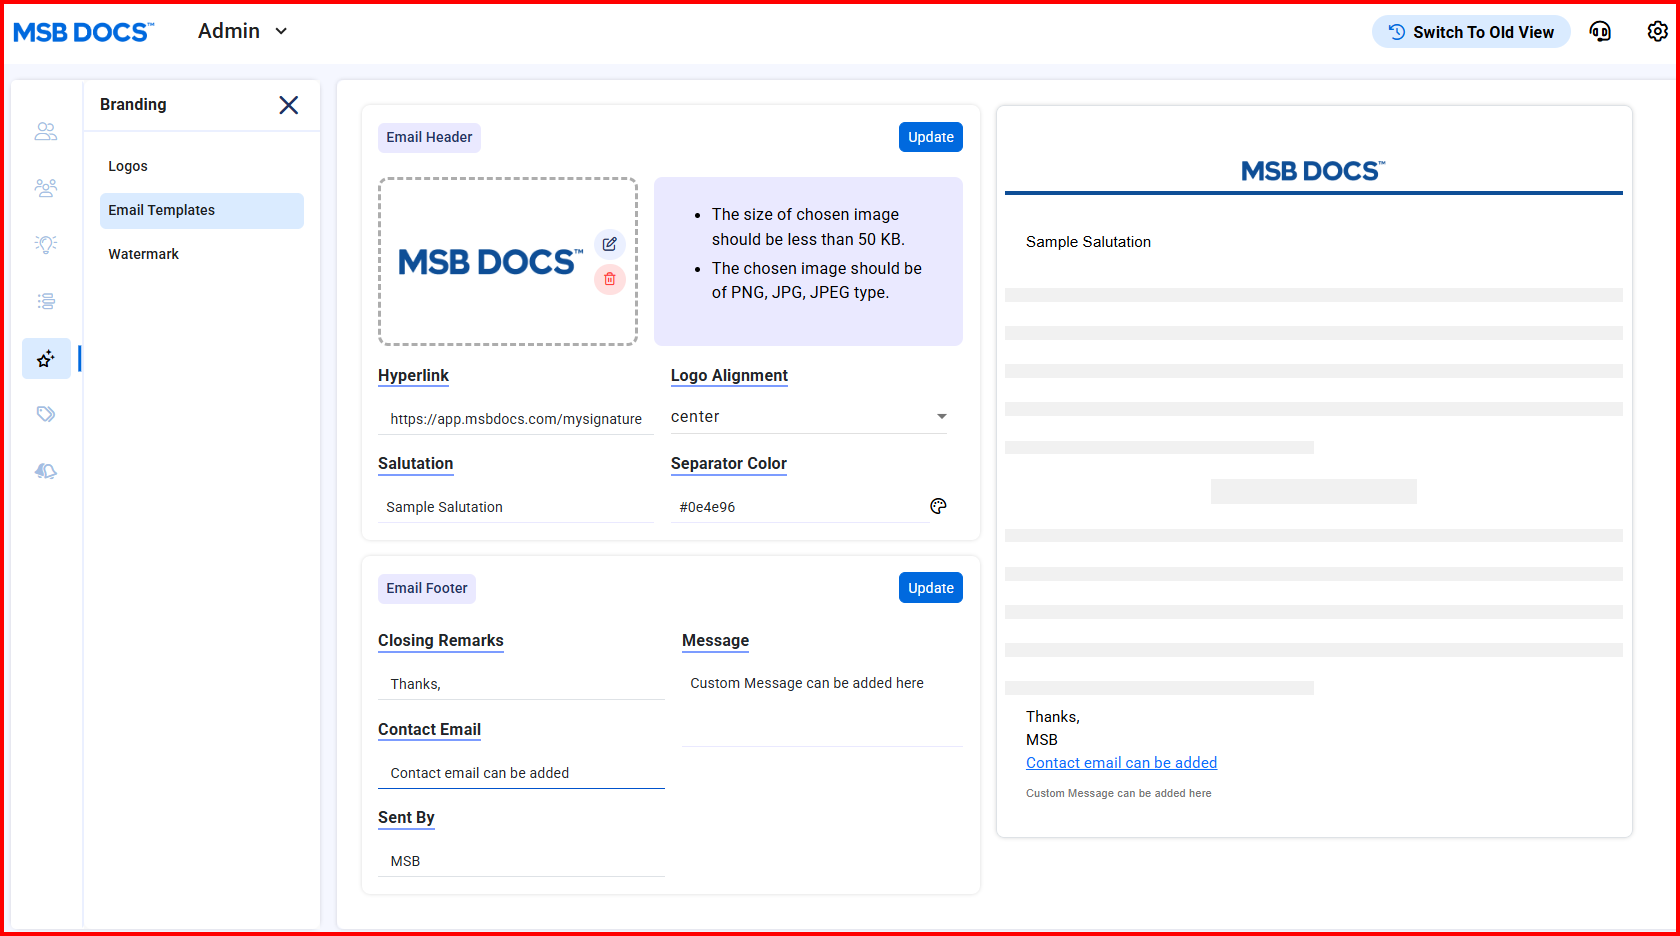
Can the header and footer of email template be updated?
Admin users may modify the header and footer of the email template from the user profile settings. Once modified by the admin, all the users of the tenant will get notification emails with the modified header and footer. The admin will be able to reset the header and footer to the default.
Admin will also have a preview option such that the changes made to the header and footer will be visible as an email preview within the Admin panel.
Contact Us
Great, Thank you!
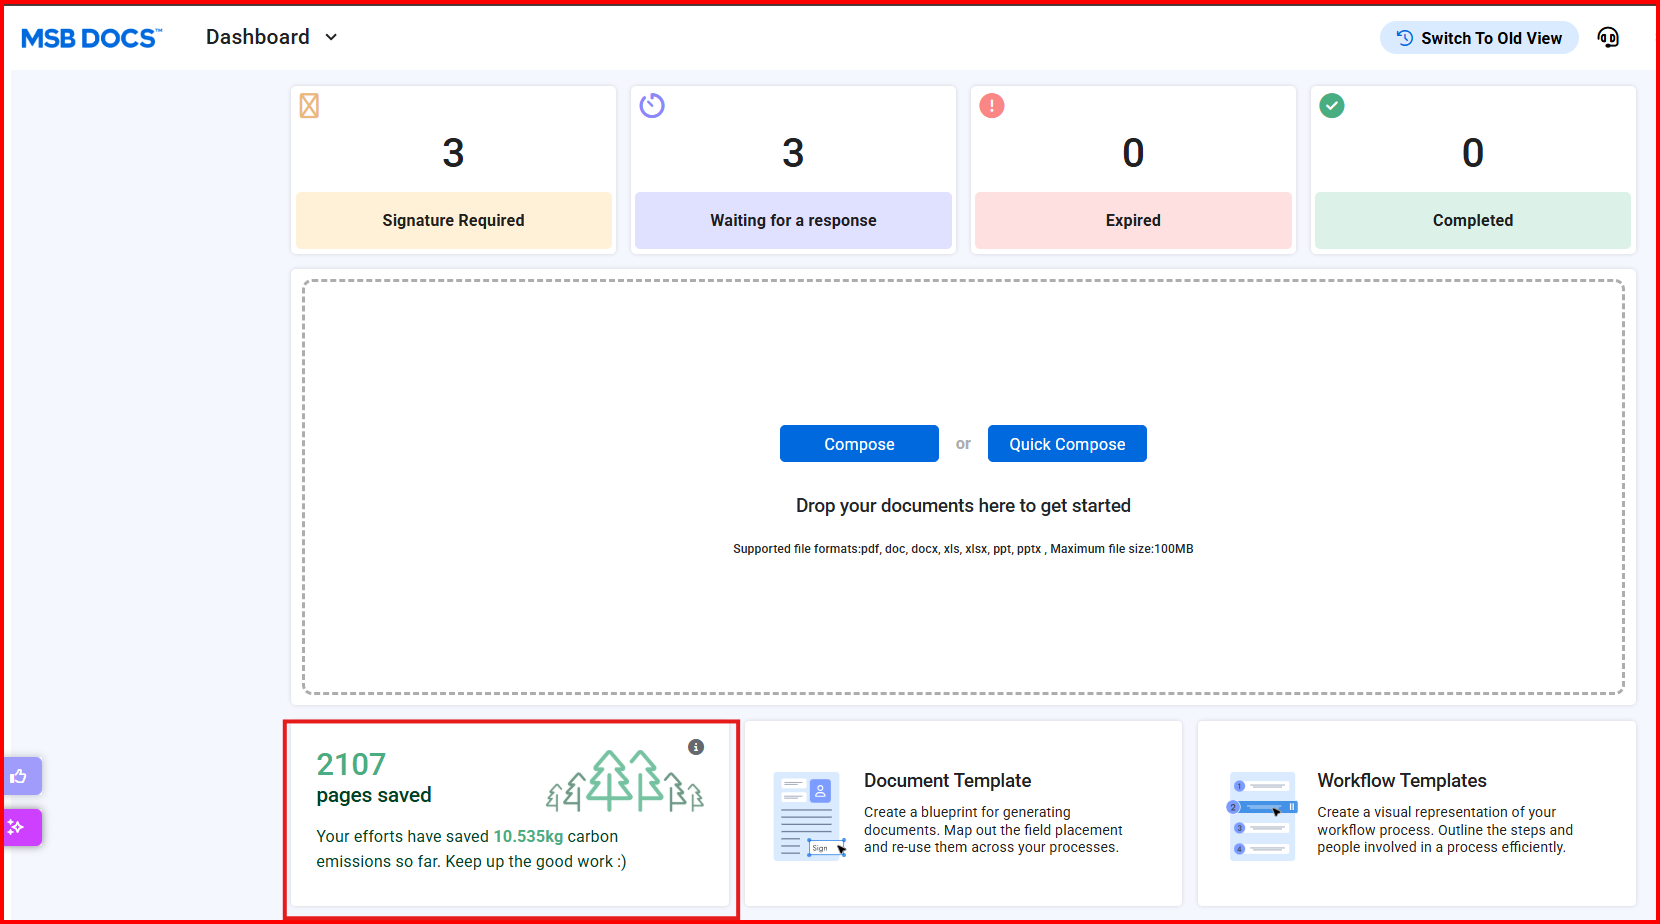
How can a user access the carbon footprint information?
Users will have the capability to access their organization’s carbon footprint information through MSB, both from the profile and dashboard.
This functionality will allow users to see the count of trees and pages they are saving collectively and the amount of carbon emission they have prevented from happening. A tooltip is visible at the top of carbon footprint which contains the source of information from where the calculations are coming.
Contact Us
Great, Thank you!
How can I download IOS/Android app links on MSB Web page
MSB login page has two different download links along with the single QR code for IOS/Android app. Download links will be visible as per the configuration set at the instance level.
Upon clicking the “Google Play Store” and “Appstore link on MSB login web page, the user is directed to the play store from where they can download the MSB app.
On scanning the QR code using the Mobile device, the Web app automatically detects the scanning device and opens the app in the platform store to download
How can I download IOS/Android app links on MSB Web page?
MSB login page has two different download links along with the single QR code for IOS/Android app. Download links will be visible as per the configuration set at the instance level.
Upon clicking the “Google Play Store” and “Appstore” link on MSB login web page, the user is directed to the play store from where they can download the MSB app.
On scanning the QR code using the Mobile device, the Web app automatically detects the scanning device and opens the app in the platform store to download.